
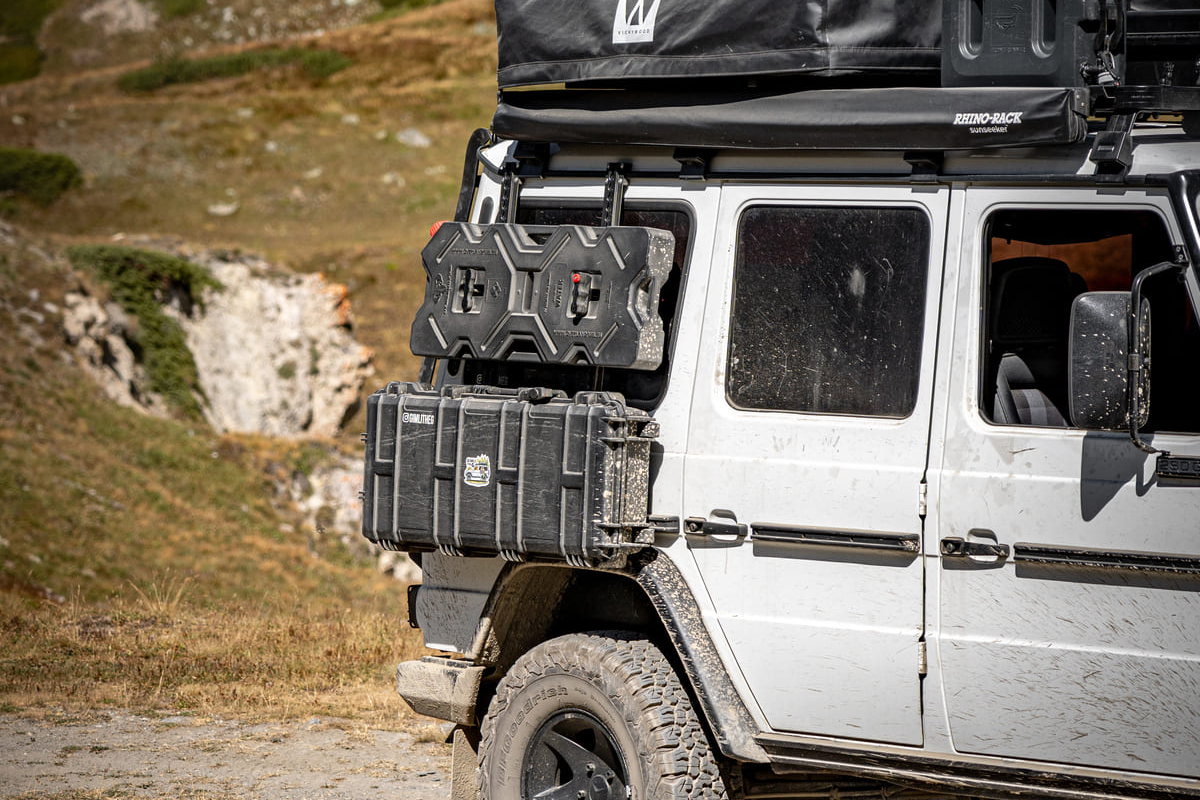
Canisters for water, drinking water and fuel from Overland Fuel are incredibly robust and made for continuous use under the toughest travel conditions. The option of external mounting on the vehicle is especially valuable, particularly when carrying fuel. At the latest in summer temperatures it is no fun to spend time, or even sleep, inside the camper with the fumes that build up.
The holders for Overland Fuel canisters come in a simple version as well as a lockable version with a drill-resistant lock cylinder – so that your restful sleep stays undisturbed not only by the smell of fuel but also by unwanted activity around the vehicle.
Mounting the Canister Holder – Step by Step
Now we will show you how easily you can mount the Overland Fuel canister holder.
Of course, these instructions are a general guideline. Your vehicle may require additional specific steps for mounting at the desired location.

Materials Needed
- Overland Fuel canister holder in the version you want
- Mounting plate (included in delivery)
- Fasteners (included in delivery)
- Liquid thread locker (included in delivery)
- Pen for marking the drill holes
- Open-end wrench or ratchet with 10 mm and 13 mm sockets
- Drill with a 6mm bit (if the mounting plate is not attached to existing drill holes)
- Optional: Reinforcement plate


Preparation
- Choose the mounting location on your travel vehicle.
The location should be stable and flat and offer enough space for both the mounting plate and the canister. - Make sure you have all the required materials at hand.
Attaching the Holder to the Mounting Plate
- Pass the two supplied hex-head screws through the holes in the center web of the mounting plate. Make sure the screw heads sit on the recessed side of the web, so that they do not get in the way when the plate is later mounted on the vehicle.
- Apply some of the supplied liquid thread locker around the thread of the screws.
- Place the holder, with its integrated threads, onto the screws and tighten them with feel and moderate hand force. Use a wrench or socket in size 13mm.


Attaching the Mounting Plate
Option 1
Attach the mounting plate to existing drill holes on your travel vehicle. This could be the case, for example, if you want to mount the canisters on your roof rack using the Overland universal mounting plate.

The universal mounting plate is compatible with the popular roof racks from Frontrunner and Rino Racks and offers a secure yet flexible mounting solution. To attach the mounting plate to the universal plate, use the supplied screws and nuts.
Option 2
If there are no drill holes, position the mounting plate at the desired location and mark the holes to be drilled in the four corners with the pen.
Drill holes at the marked spots, using a bit with the diameter of the supplied screws (6mm).
Note: The slightly larger diameter of the square shoulder pulls into the sheet metal as you tighten the screw – this is intended and adds to stability).
Note:
Depending on the material of the mounting surface: Seal the cut edges of the holes with a rust inhibitor and let it dry according to the manufacturer’s instructions.
Pass the four included carriage bolts from the front through the mounting plate and mounting surface. Secure them from behind with the supplied washers and self-locking nuts. Tighten these with a 10 mm open-end wrench or a 10 mm socket, again with feel.
The square shoulder under the screw head wedges into the form-fit cutout of the mounting plate and keeps the bolt from turning with it.


Optional Use with Reinforcement Plate

The optionally available reinforcement plate provides even better load distribution of the ultimately heavy weight on more sensitive body parts.
It is mounted in a sandwich arrangement:
mounting plate on the outside, mounting surface in the middle, reinforcement plate on the inside.
Mounting the Canister
- Place the canister on the holder.
- Secure the canister by turning the handle. With the lockable holder, you can lock the handle in this position and so protect the canister against unauthorized removal.
Video: Mounting Example with Universal Plate
Final Check
Check once more that all screws and nuts are tight.
Make sure the canister and the holder’s handle sit firmly in position.

Conclusion
With its holders for external canister mounting, Overland Fuel offers a versatile, flexible and secure way to mount them.
Installation is very easy to do yourself and requires only a few steps.
You can get canisters, mounting material, holders and other Overland Fuel accessories from us in the tigerexped shop.
We wish you lots of fun on your travels with it.


Feel free to share this article with other vanlifers and overlanders who would be glad of the information it contains.