

Vehicles from the Ducato family offer very good conditions for a space-saving installation of an auxiliary heater under the passenger seat. The available space is generous, the line runs are short – and access to the tank is comparatively easy, too. Via the easily accessible tank console, the Easy fuel pickup from our Ducato installation kit lets you set up the fuel supply without removing the tank sender. That saves time, avoids unnecessary intervention in the fuel system and reduces typical problems such as odors or leaks.
In the following article, we show the installation of the Ducato kit in a Fiat Ducato as an example. The basic procedure can equally be applied to identical vehicles such as
- Citroën Jumper (formerly C25),
- Peugeot Boxer (formerly J5) and
- Opel Movano (from 2021)
The installation kit is suitable for all of these models without vehicle-specific modifications.
Still, vehicles differ in details depending on model year, version and seat console. The procedure described here is therefore not meant as a rigid step-by-step manual, but as a practical example of how the installation is often done on these vehicles and has proven itself in practice.
What’s Included in the Ducato Installation Kit – and What Else You Need
The Ducato installation kit contains everything you need for a straightforward installation of the auxiliary heater. That naturally includes
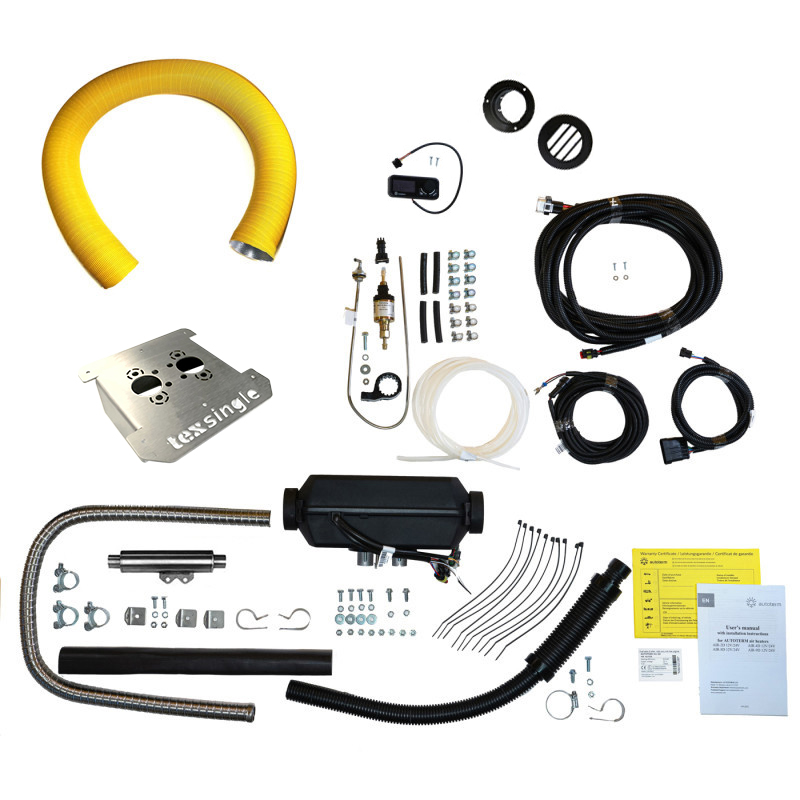
- an Autoterm Air 2D diesel auxiliary heater incl. installation material,
- the Easy fuel pickup,
- an installation flange,
- an air outlet,
- a piece of air duct hose and
- optionally the matching adhesive.
In addition, you only need a few wood screws to fasten the flange to the raised base.
Fitting the Fuel Pickup
The Ducato installation kit includes the Simply fuel pickup, which turns the most dreaded task of installing an auxiliary heater into child’s play. No drilling into the tank, no removal of the complete tank sender unit, no subsequent leak or odor problems – and it’s done in a few simple steps.
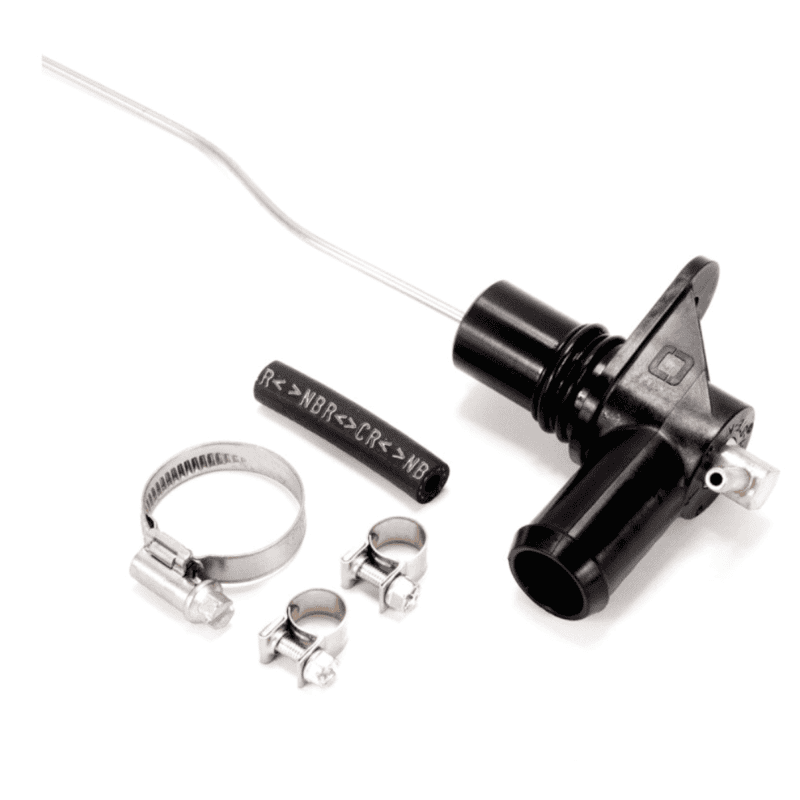
The delivery includes everything you need to fit the pickup into the tank sender console.
Note: Don’t do this job when your vehicle is filled to the brim. Otherwise fuel may escape from the vent.
Removing the Seat Console
The first task is removing the passenger seat console.
Depending on the vehicle model, it may be closed, partly open or a tubular frame – we point this out at the relevant places.
Exposing the Tank Sender Unit
To fit the fuel pickup, you first have to remove this cover on the floor between the driver’s and passenger seat.
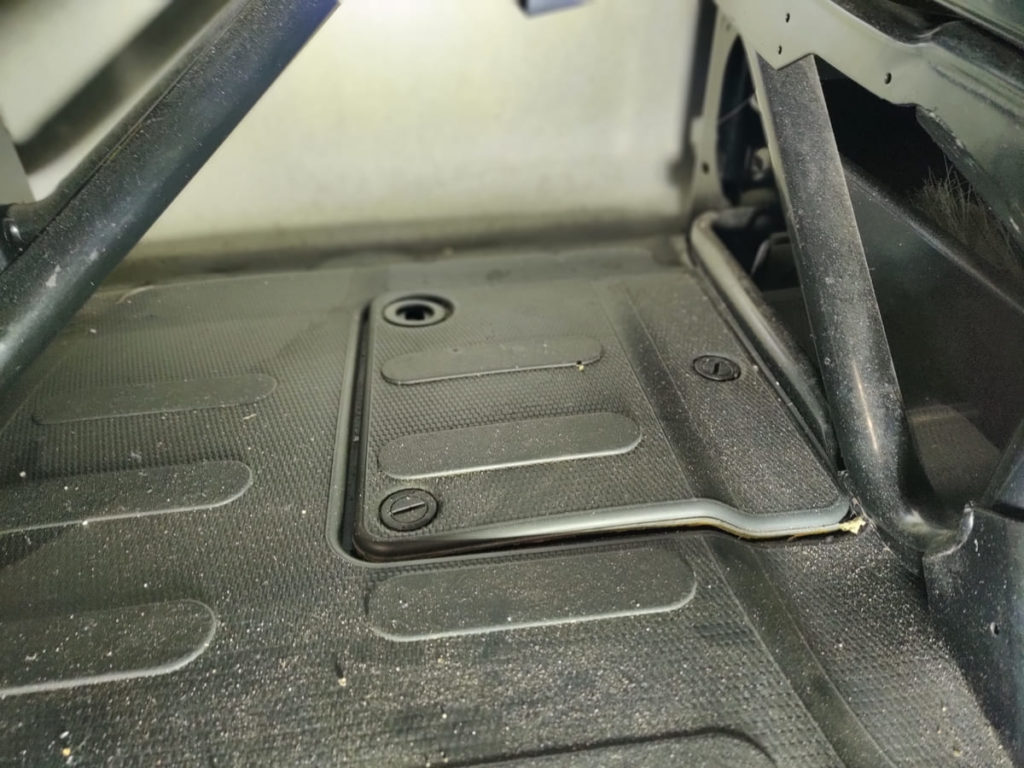
Underneath is another cover, fastened to the floor panel with three screws. Remove this one too to get access to the tank sender unit.
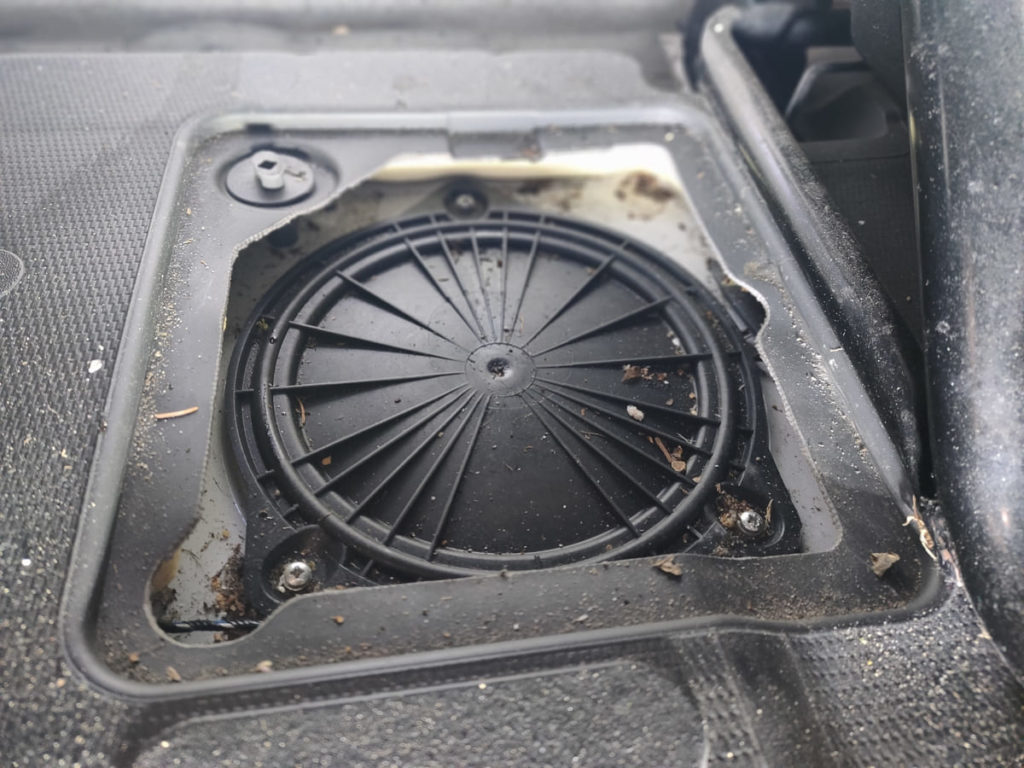
Fitting the Easy Fuel Pickup
After removing the cover, you now have access to the tank sender unit. The thick hose is the tank vent. The bolted-on plastic elbow is removed and replaced with the Simply fuel pickup.
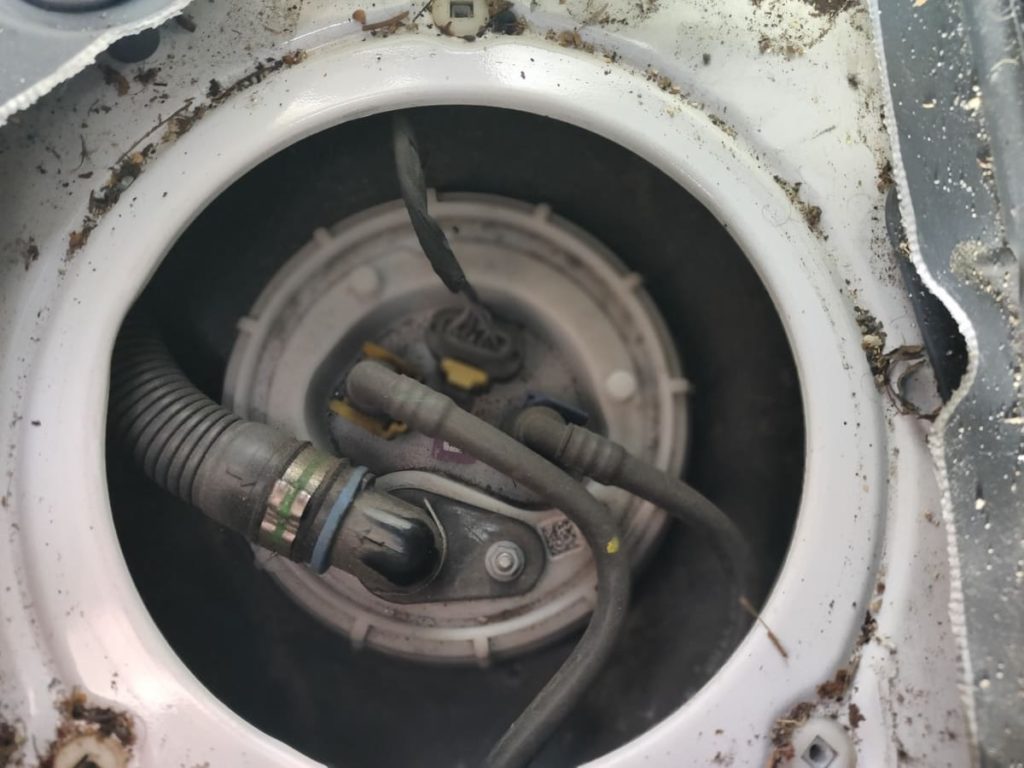
This is how you remove the tank vent:
Loosen the 8 mm nut and pull the plastic elbow off upward. You will need to carefully pry with a flat-blade screwdriver to do so.
Now the plastic elbow is taken off the hose.
To do this, pry off the hose clamp with a small flat-blade screwdriver. You’ll find a new screw clamp in the delivery of the Easy fuel pickup.
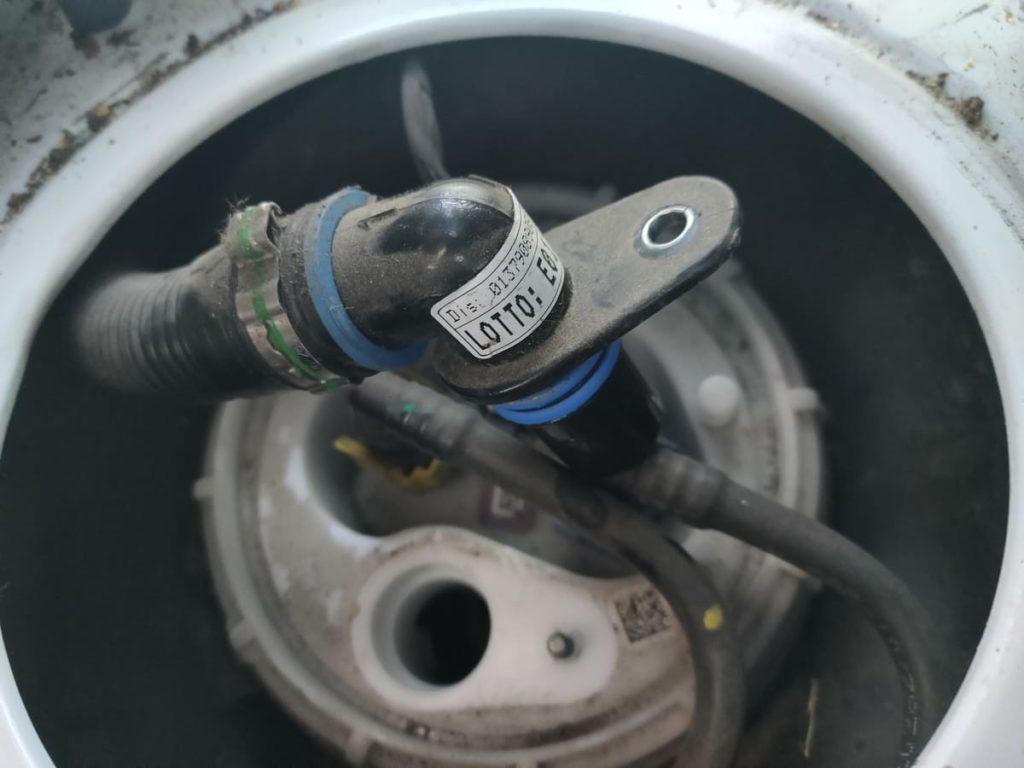
When pulling the hose off the plastic elbow, make sure the blue insulation doesn’t stay stuck to the plastic. It has to be slid onto the Easy fuel pickup.
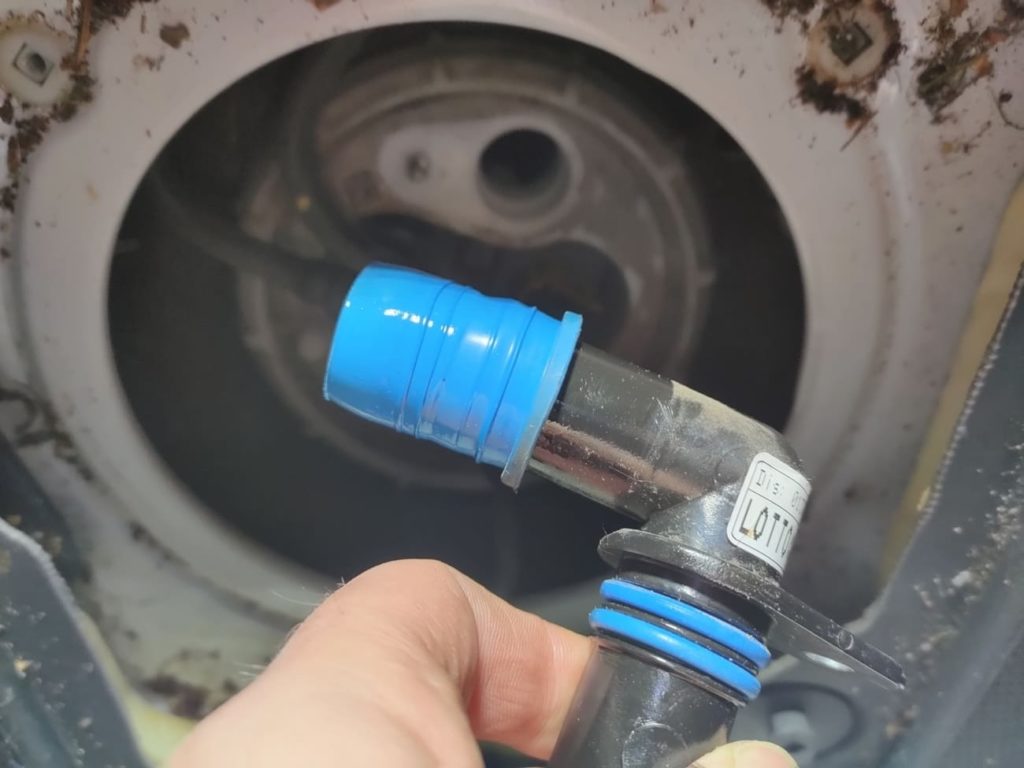
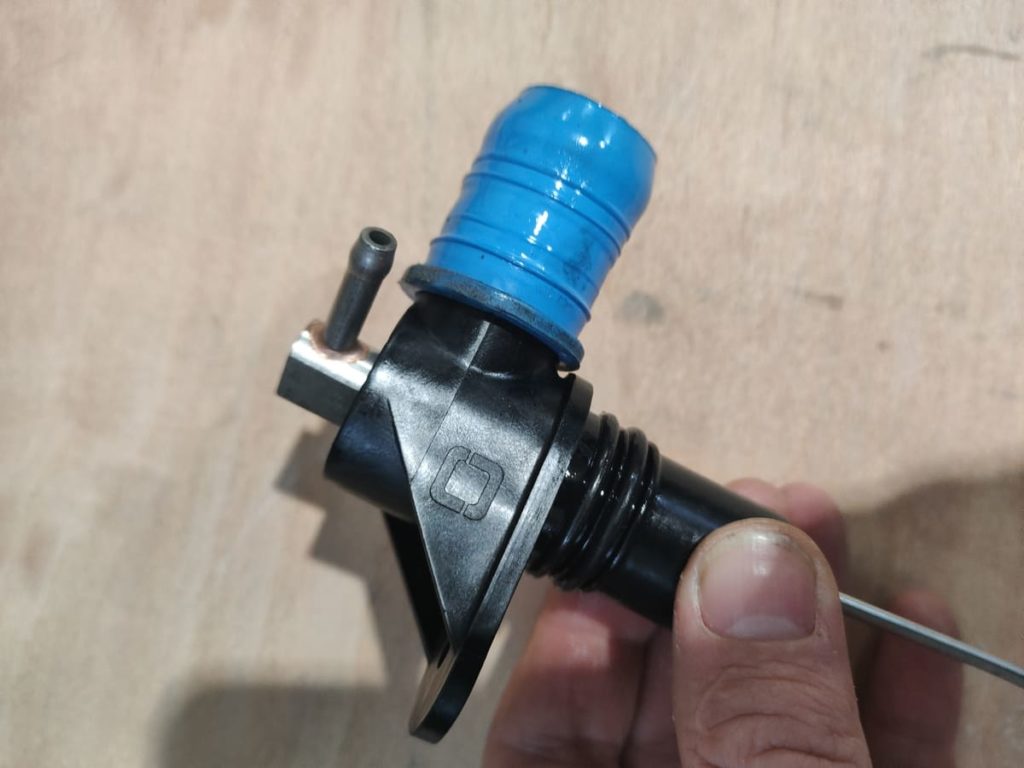
Now the Easy fuel pickup can be inserted into the vent hole.
Since the pickup tube is pre-bent, it fits neatly into the tank unit. You should not feel any resistance when inserting it.
Screw the inserted pickup down tight.
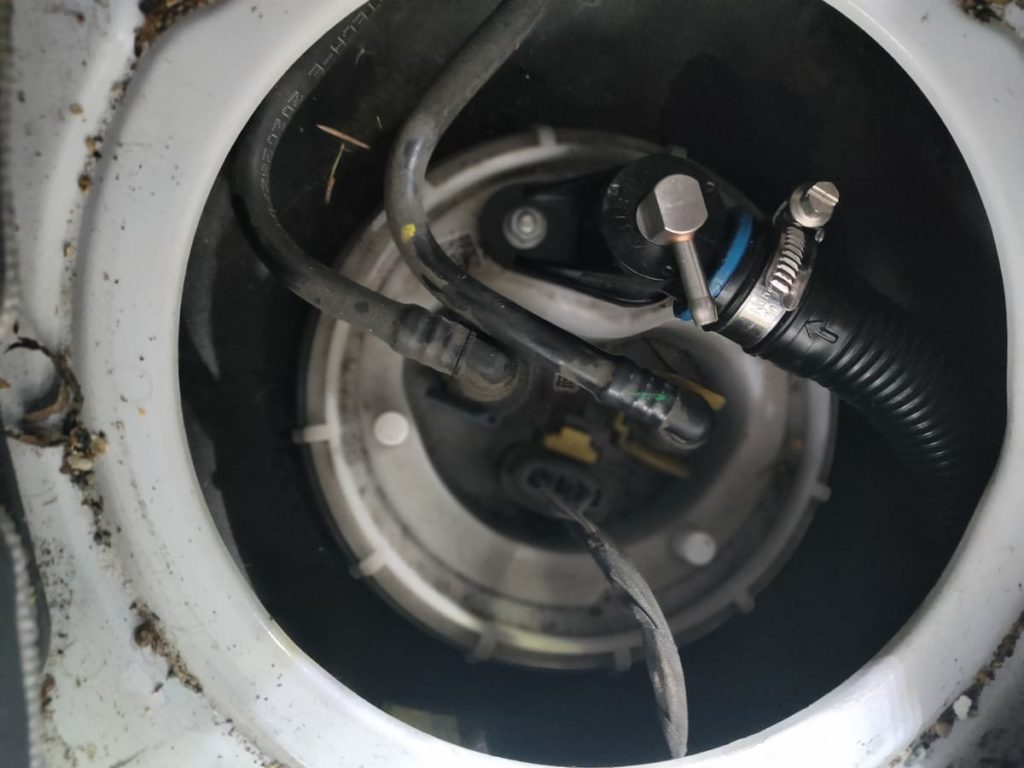
Now the fuel line can be attached to the pickup using the 5 cm rubber hose.
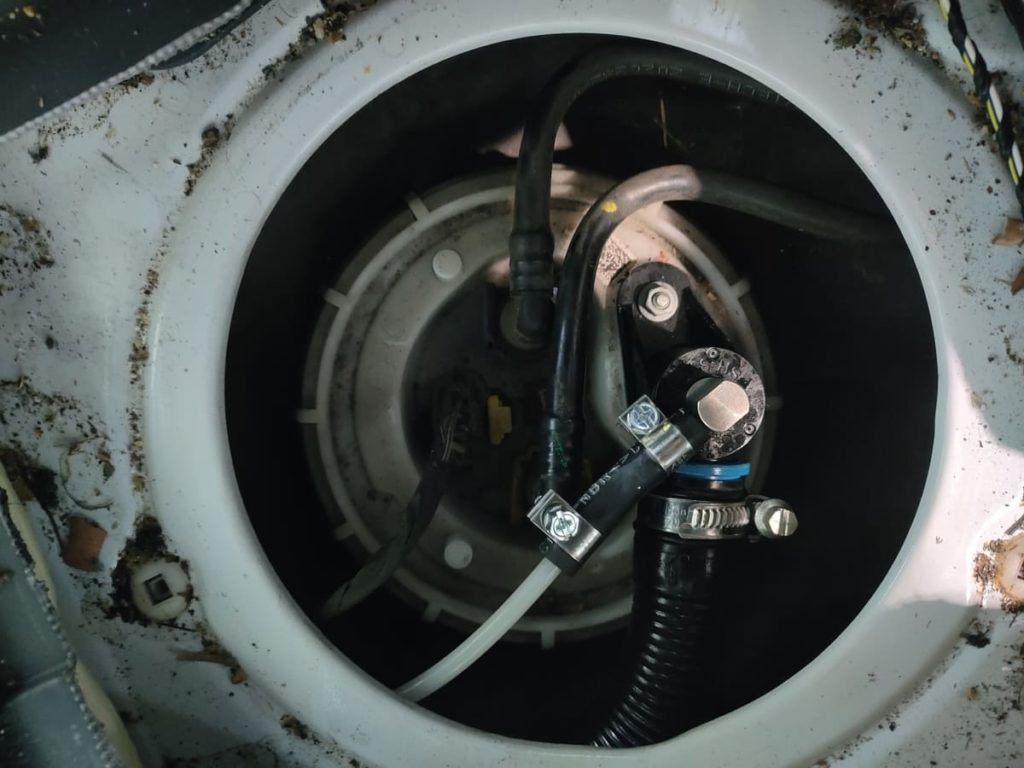
We recommend routing the fuel hose in a gentle curve along the original fuel line in the direction of travel.
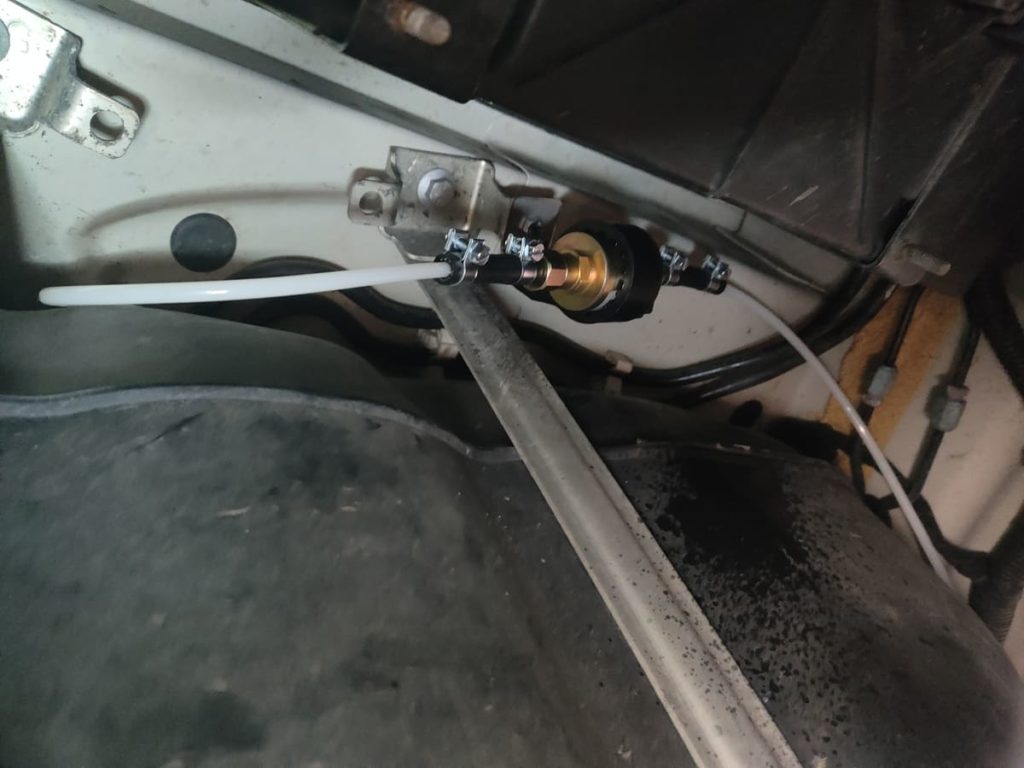
On the tank’s retaining straps there are brackets where the fuel pump can be mounted in a protected spot. From there it is only a short way to the heater, and the pump is no more than 1 m from the tank, as required by the installation regulations.
Fitting the Flange
Our Ducato installation kit includes a flange for easy mounting of the auxiliary heater. Instead of individual holes and bores, you only need to make a single rectangular cutout in the floor panel. That not only saves work but also ensures that the heater and all inlets and outlets sit free of stress. The flange also provides thermal decoupling.
Here’s how the installation works.
Removing the Heat Shield
First, remove the exhaust heat shield underneath the vehicle. Without removing it, you can’t reach the underbody below the passenger console. It is fastened with Torx screws and can be removed by rotating it around the exhaust.
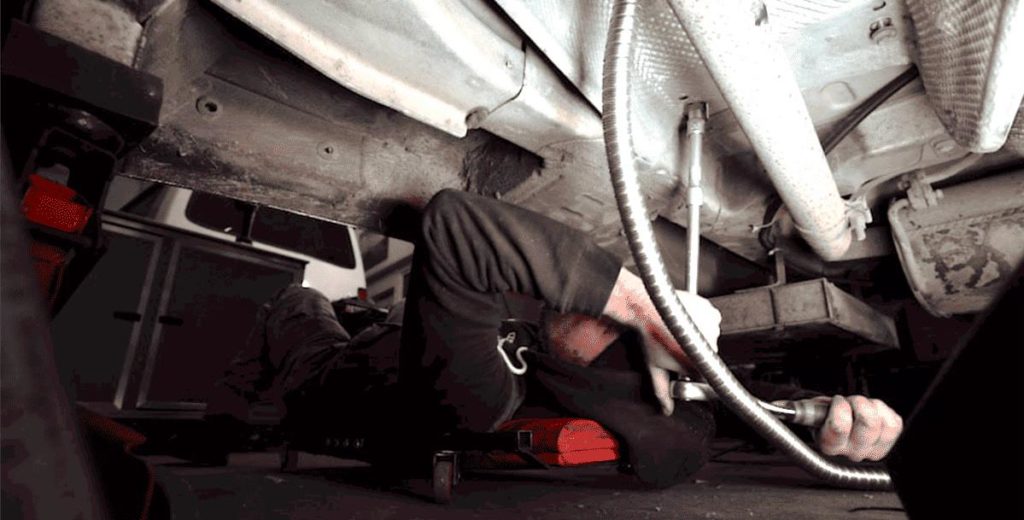
Later, a hole of about 30 mm for the exhaust will be drilled into this heat shield.
Determining the Flange Position
Next, measure out the position of the installation flange within the console. Make sure the cutout sits as centrally in the console as possible.
Cut out the hole for the flange. Treat the cut edges of the sheet metal with rust protection and let it dry well.
Building the Flange Riser
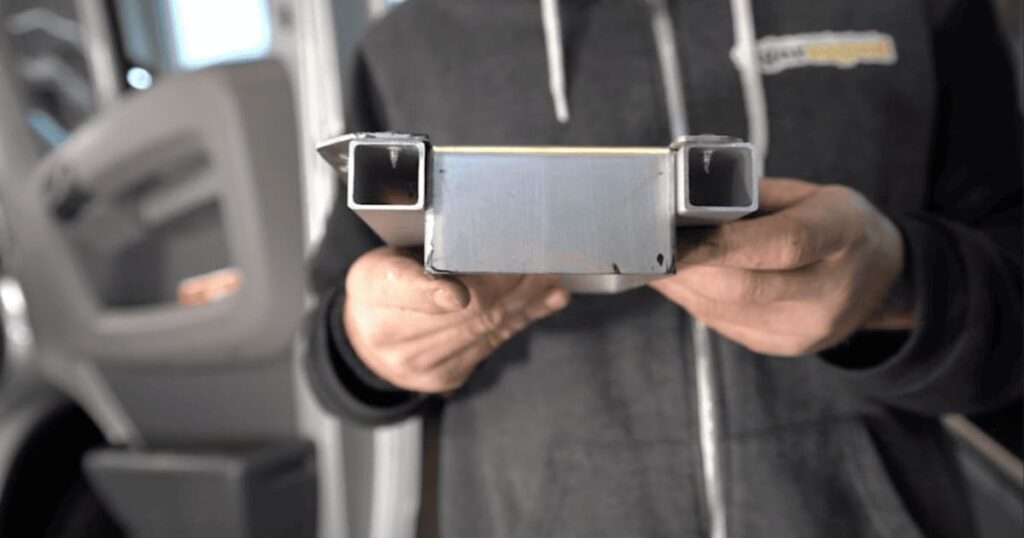
The vehicle’s floor insulation is very thick at this point. The flange therefore has to be placed on a 25 mm riser. You can use wooden strips or aluminum tube for this.
Drilling the Hole
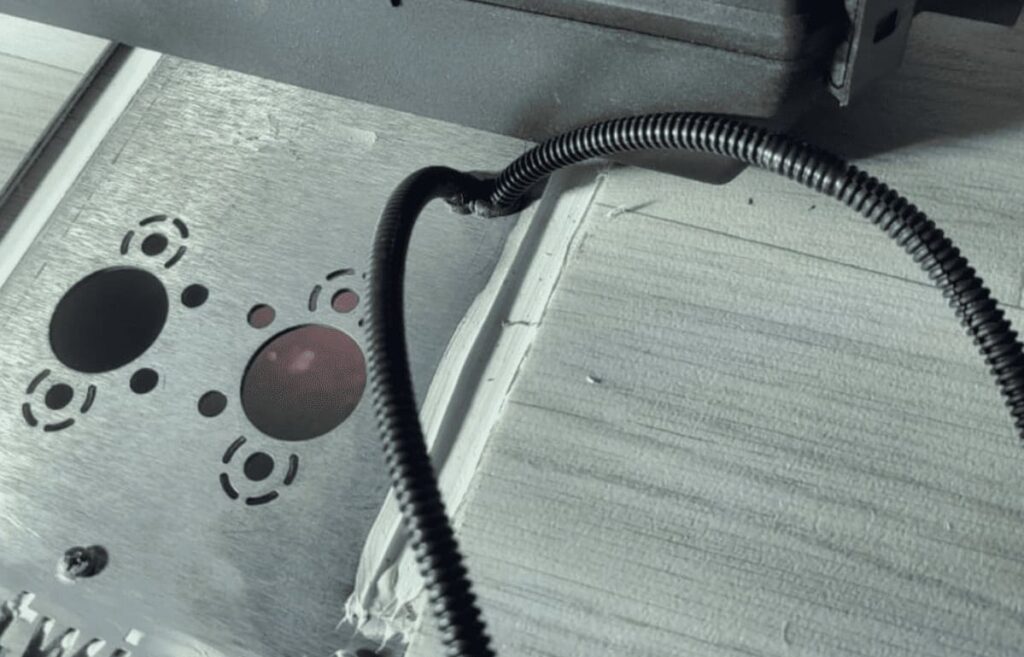
Drill an 8 mm hole in one corner of the installation flange. The pump cable will be pushed through here later. Here you can see what it will look like once installed.
Fastening the Flange
Now place the flange into the prepared cutout. The surfaces of your flange riser are glued to the floor for fastening.
From below, the gap between the flange and the cut edge of the cutout in the vehicle floor is sealed with sealant.
Connecting the Intake / Exhaust
Once the flange is installed, the heater can be fastened on it and the burner intake bolted to the unit from below. To identify the right parts and positions, use the heater manufacturer’s manual – you’ll find it in the heater’s package, or here for download.
The intake later stays above the heat shield.
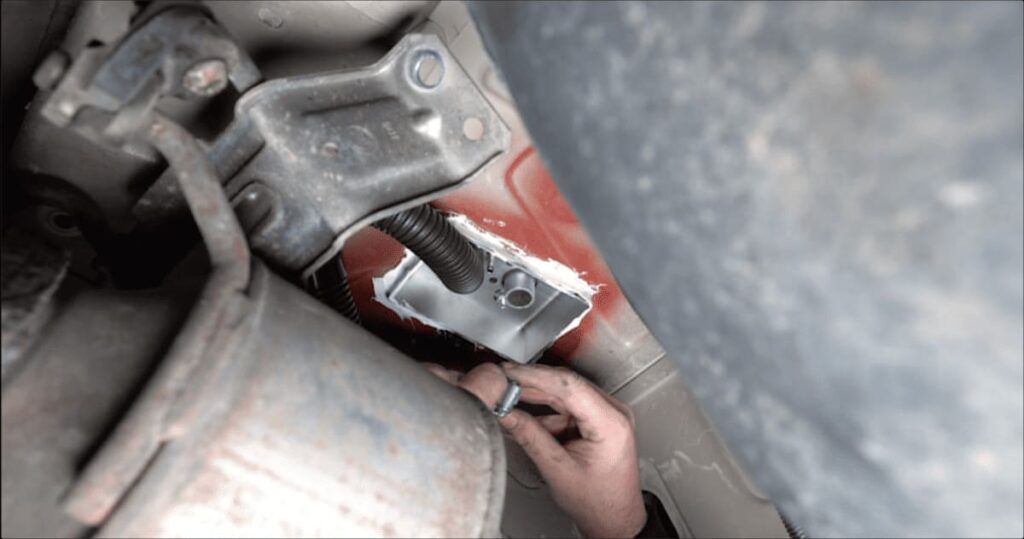
Now the exhaust pipe and the fuel line are attached to the heater.
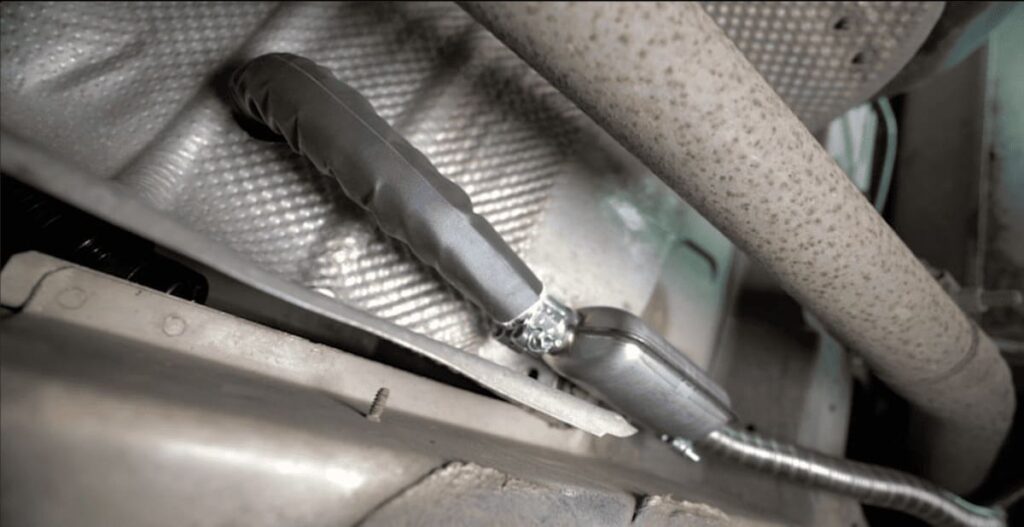
Before the heat shield can be refitted, a 30 mm hole has to be made, as hinted at above. When attaching the shield, the exhaust pipe is pushed through the hole in the shield together with its heat insulation.
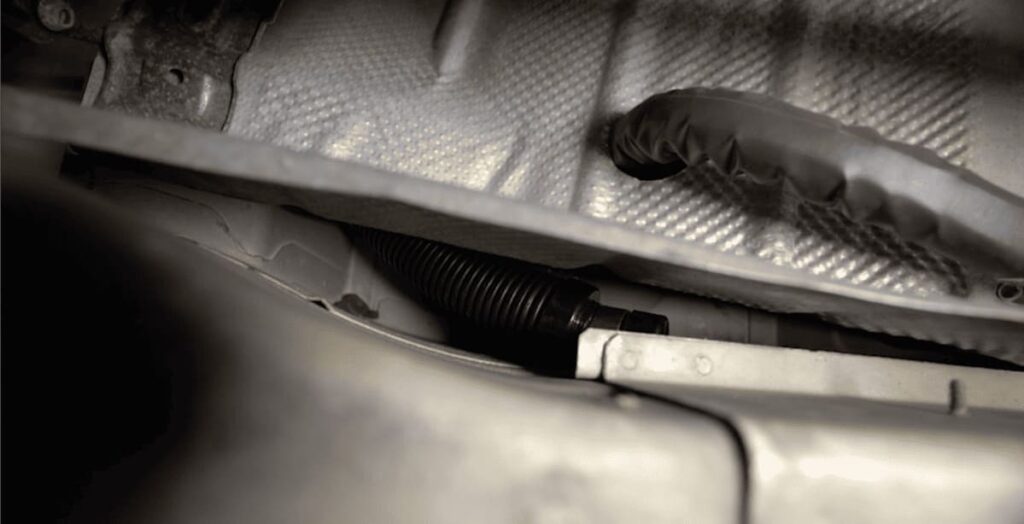
Now you can fasten the silencer to the heat shield and route the end piece of the exhaust line along the vehicle’s exhaust.
Installing the Warm Air Outlet
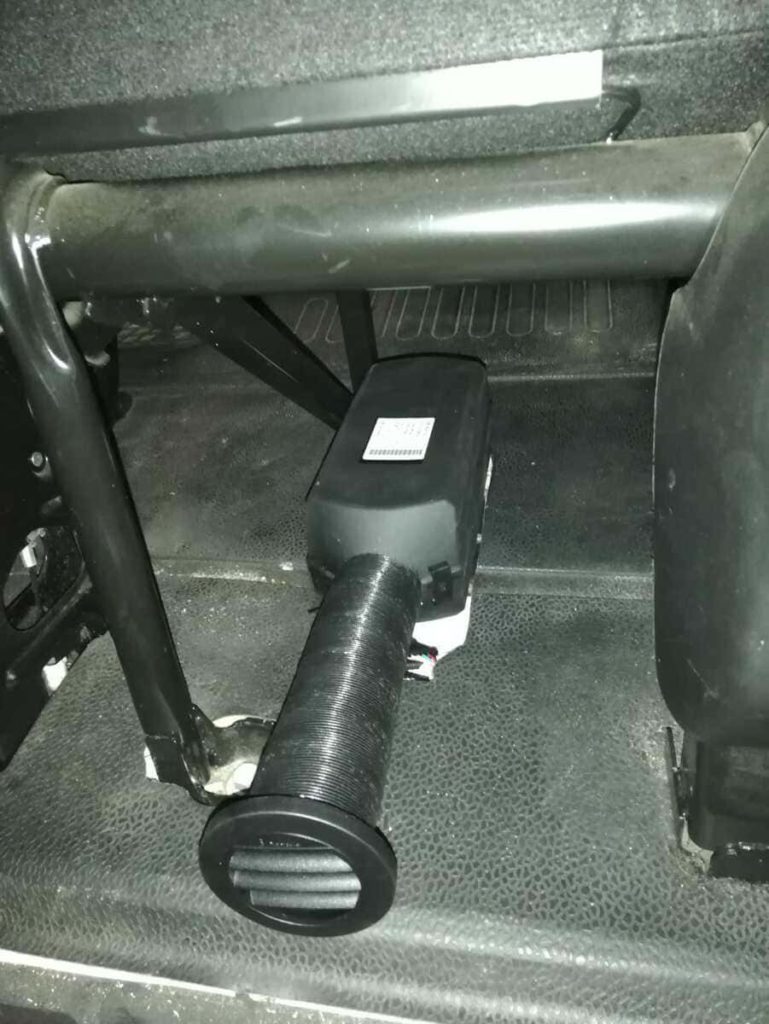
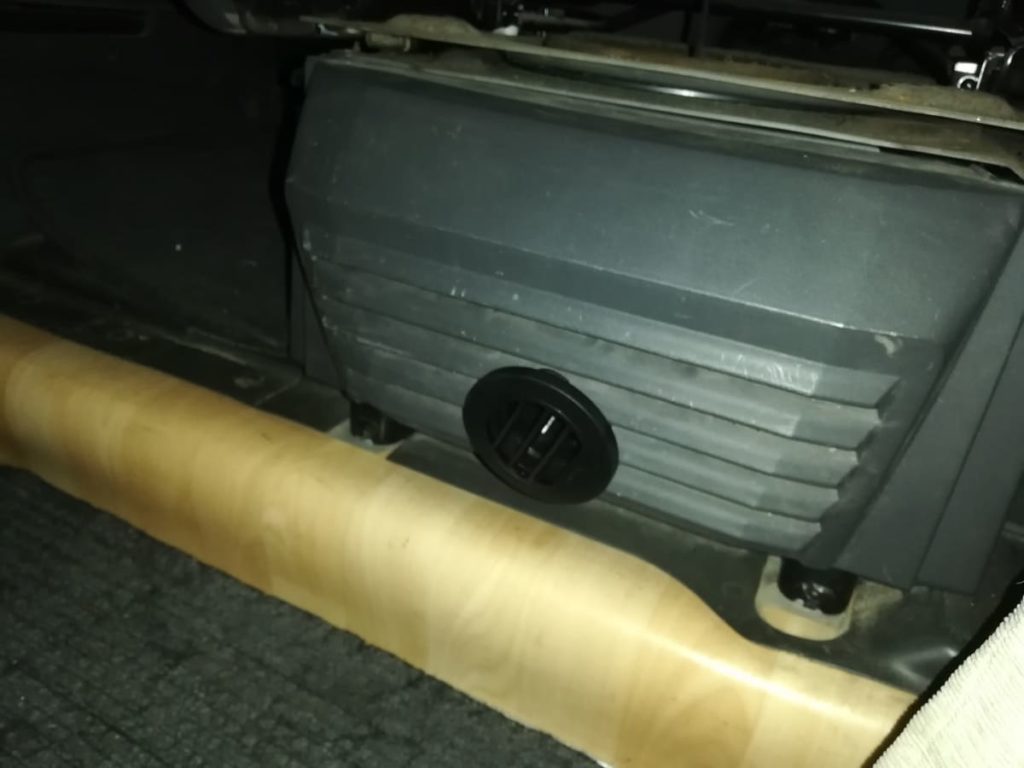
The Ducato installation kit includes a warm air outlet that is installed in the seat console.
Depending on whether your vehicle has a closed seat console, a double seat console or an open console, you may need to cut a hole in the seat trim for the air outlet or build a mounting frame for it.
The heater’s warm air outlet is connected to the air outlet using the supplied piece of air duct.
Installing the Control Panel
As the last step, the control panel can be mounted anywhere you like and the power supply to the heater connected.
The heater’s delivery includes a 1.8 m cable for this. If the desired mounting spot for the control panel is farther away, a 3 m extension cable or a 5 m one can optionally be ordered.
Now you can start your diesel auxiliary heater for the first time. Which problems can occur and what is perfectly normal, you’ll learn in the following article:

Read now:
You might also be interested in these articles about your new auxiliary heater:



Did the article help you? Then feel free to share it with like-minded people who might also be glad to read it: