
A particular topic relating to the pressurized water system keeps coming up in our support and in training sessions. Typical questions are:
- “Why is my safety valve dripping?”,
- “Why is the pressure suddenly so high?” or
- “Do I even have to adjust the pressure reducer?”
The cause of problems almost always lies in a wrong (or even missing) setting or positioning of the pressure reducer.
The good news: both are actually quite simple, and problems like a dripping safety valve are easy to fix.
In this article, tigerexped technician Nico explains how it’s done.
Are Pressure Reducers Preset?
A pressure reducer is often marked with something like “1-3 bar”. This often leads to the misconception that it is preset. That is not the case.
For safe pressure in the system, the pressure reducer must be set under flow after installation. That leads us straight to the most common problem.
Setting the Pressure Reducer – Here’s How
It often happens that people turn the pressure reducer and expect something to happen. The working principle of this component is different, however.
What matters:
A pressure reducer is not set at standstill but with the faucet open – that is, under flow.
Here’s how to proceed – step by step
- Open a faucet so that water flows.
- Use a screwdriver or hex key and change the water pressure by turning the screw on top of the pressure reducer while the water is running – counterclockwise for less pressure, clockwise for more.
- Close the faucet.
- Now read the water pressure off a pressure gauge.
- If necessary, repeat this process until the desired value is reached.
So the pressure is
- changed during flow, but
- read when the system is closed.
What Problems Can Occur If the Pressure Reducer Is Set Wrongly
A correctly set pressure reducer protects the peripherals of the entire system. Many components are not designed for high pressures and can be damaged, which can lead to leaks and water damage in the camper.
Safety Valve Drips Constantly
To avoid problems caused by excessive water pressure, a hot water boiler has a safety valve, which is usually rated for a maximum of 3 bar. If this pressure is exceeded, the valve opens and water is released from the boiler to lower the pressure.
Since hot water expands, however, the pressure reducer must not be set to the permissible 3 bar. The inlet pressure has to be lower so that the limit is still respected when the water heats up.
It’s advisable to first set the pressure reducer to 1.5 bar. That keeps the sum of inlet pressure and thermal expansion just below the 3 bar mark.
If you like, you can also start at 1 bar, heat up the system, check everything for leaks and then work your way up slowly – to just below the opening pressure of the safety valve.
Pressure Reducer With or Without a Pressure Gauge?
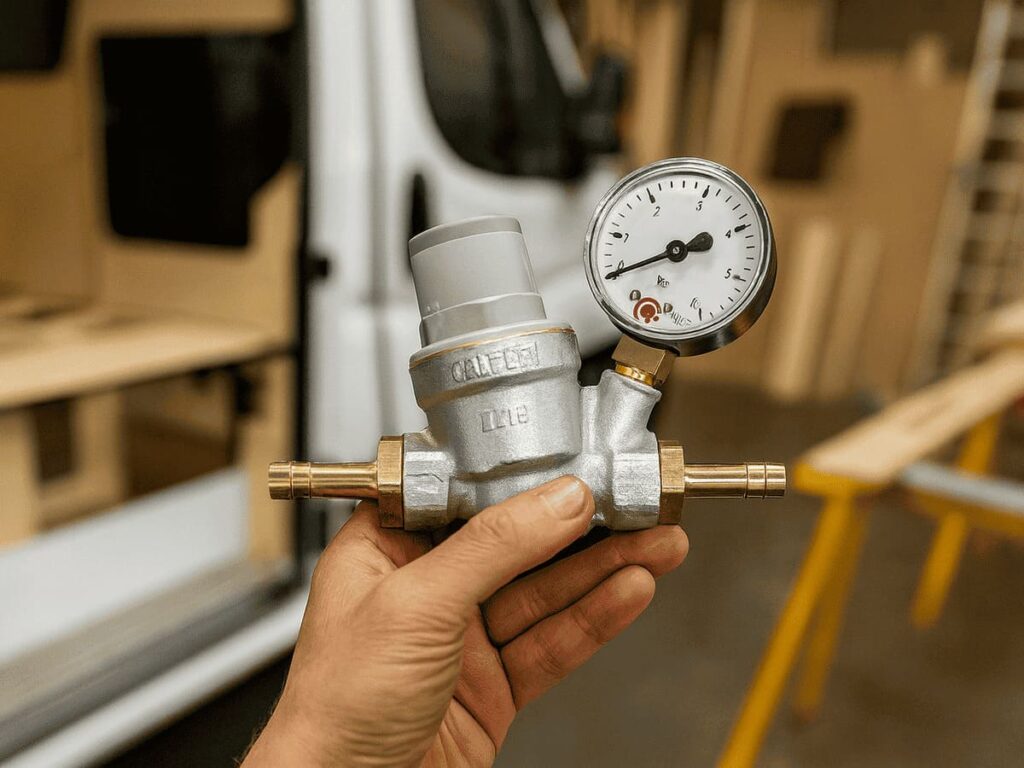
There are two types of pressure reducers – with an integrated pressure gauge and without.
With a Built-in Pressure Gauge
We recommend this type for every DIY builder and everyone who isn’t a professional or doesn’t have a specialist company.
You can read the system pressure directly and need no additional device.
Another advantage is that you can take a quick look at the water pressure on the road too, with no hassle

Pressure reducer with integrated pressure gauge, adjustable from 1 – 5.5 bar, including two 10 mm hose nozzles.
Without a Pressure Gauge
Here an external pressure gauge has to be connected at the water outlet in the camper in order to set the pressure.
The procedure is exactly the same, but the external test device is usually considerably more expensive, less practical to use and allows no later checks. So even if you were able to borrow an external pressure gauge from a trade business or an acquaintance – later on your travels you simply won’t have it at hand anymore.

Simple pressure reducer without integrated pressure gauge, adjustable from 1 – 4 bar, including two 10 mm hose nozzles
The Right Installation Position of the Pressure Reducer
Just as important as the setting is the position of the pressure reducer in the system.
The pressure reducer always belongs after the pump. If water filters are used, also after the filter.
Up to that point, the order of components is therefore tank → pressure water pump → accumulator tank → drinking water filter.In the following course of the water system, the line is then split by a T-piece – one line, the cold water line, goes straight toward the faucet, while the boiler is integrated into the other line, forming the hot water line.
What’s very important when positioning the pressure reducer is that it is placed BEFORE this split of the water line.

Why Not Directly in Front of the Boiler?
The reason is that we need the same pressure everywhere in the system.
If you put the pressure reducer after the branch and thus directly in front of the boiler, the boiler inlet pressure would be reduced, but the rest of the cold water line would still carry the full pump pressure (with the tigerexped pump, e.g., 4.2 bar).
If you then open the faucet to the mixed position (half hot, half cold), we don’t just have the problem that less water comes out on the hot water side.
Through the faucet, the high cold water pressure of 4.2 bar is also pushed backward into the hot water line and thus into the boiler – and the pressure stays there, because a check valve sits at the inlet, i.e. the cold water side of the boiler.
So despite a set pressure reducer we have a water pressure of 4 bar on the boiler – the safety valve opens – and that’s why it drips.
Only if the pressure reducer sits before the split into cold and hot water is the entire system pressure reduced and all components evenly protected.
Conclusion
A pressure reducer that is set correctly, meaning under flow, and positioned correctly ensures even water pressure throughout the system.
Our recommendation: use a pressure reducer with a pressure gauge – so you can check the system at any time, even on the road.
You’ll find more info on setting up a pressurized water system in a camper in our article Pressurized Water System for Campers – Components, Setup, Installation
You might also be interested in these articles:


tigerexped technician Nico
brings worldwide travel experience – from Australia to Canada, with vehicles such as the Toyota LandCruiser and Mitsubishi Delica.
As a trained automotive mechatronics technician and experienced, professional vehicle builder, he is a true all-rounder. Whether technical or travel know-how – Nico’s many years of experience solve many a tricky problem.
Did this info help you? Then feel free to share it with friends and like-minded people: