
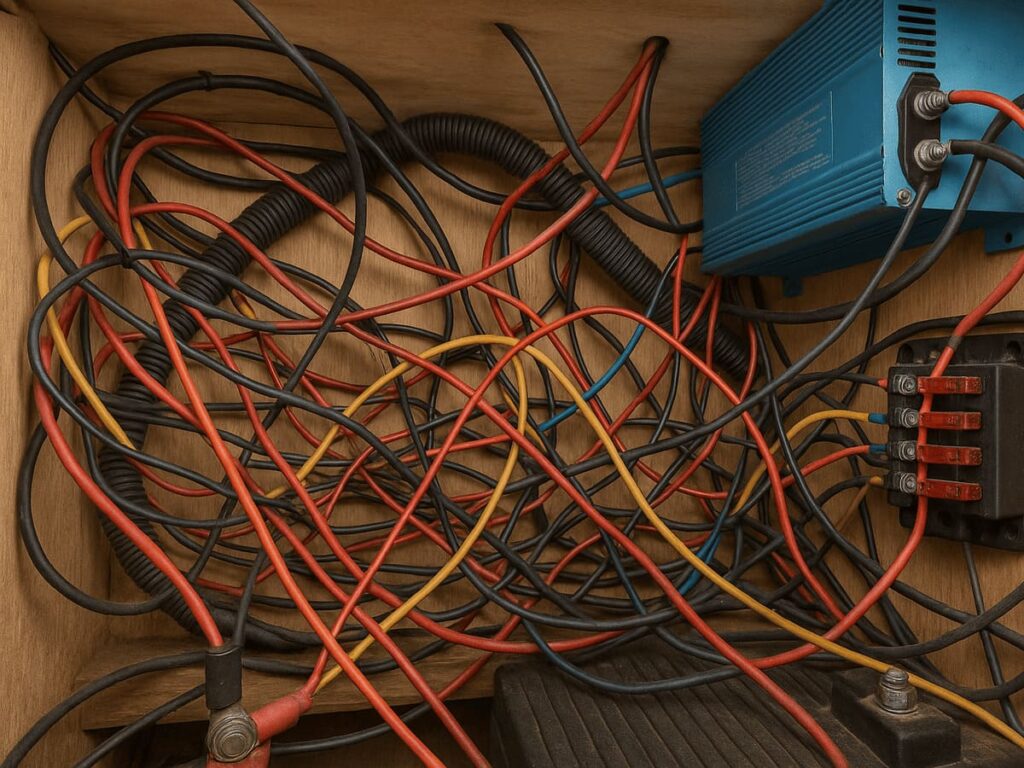
A well-planned and cleanly installed electrical system is the heart of a self-sufficient camper. But there are many pitfalls: little space, confusing cable runs, wrongly chosen components or poor connections often lead to problems.
Anyone who takes on their camper electrics themselves faces a few questions: How do I choose the right cable cross-section? Which fuses do I need? And how do I prevent a seemingly simple circuit from turning into an impenetrable tangle of cables in which I can no longer identify any fault later on?
The good news: many of the typical wiring mistakes in a camper or motorhome can be easily avoided with a little planning, the right material and some basic knowledge. In this article we want to help you with exactly that – we point out the most common wiring problems in campers and give you practical tips as well as further information in additional specialist articles.
No Ventilation to Protect Against Overheating
Especially with components that you would rather “forget” about on the road, you are tempted to use every gap and squeeze them in “somehow”. Even so, you should not ignore certain requirements for the environment of electrical components and their wiring, in order to ensure long-term function and above all the necessary safety.
Electrical devices are particularly affected by a lack of ventilation, because as everyone knows: they get warm in operation. Although everyone knows this, people often forget to design the installation so that heat can escape. If heat builds up, thermal overload can occur – with loss of performance, failures or even damage to the devices.
But the wiring, especially fuses and terminals in compact distribution systems, should not be installed completely airtight either – under continuous load or with poor contacts, heat can build up here too, which shortens service life or may lead to damage.
So pay attention to:
- Air circulation around the component (no dense insulation mats around it).
- Warm air should be able to escape upward while cool air flows in from below. So make sufficiently large ventilation openings for the electrical compartment. They can be covered attractively with ventilation grilles (often made of aluminum and available at hardware stores), for example. The size of the ventilation area always depends on the heat actually generated – so check a few times at the beginning how much heat your electrical compartment really produces and whether improvements may be needed!
- No installation directly next to heat sources such as air ducts.
Every electrical component should also remain accessible. Even if fuses are “rarely” replaced – if they disappear behind five layers of furniture or paneling in an emergency, troubleshooting quickly becomes a test of patience.
- Always keep panels and covers removable (easily and ideally without tools), even if it would be easier at first to simply screw them on. (Quarter-turn fasteners, for example, work well in such places.)
- If possible, already consider at this first step whether the planned installation would still leave you the option (or let you create it) to expand the system later. Only on the road will you notice what else you are missing, and then you will be glad to be able to add another circuit after the first trips.
No Mechanical Protection for the Cables
Especially in tight spaces, it is essential that cables are mechanically protected and routed free of tension. Crushed cables or loosely routed wires that chafe on edges lead to dangerous short circuits. Here is what to watch for:
- Protect cables from chafing of the insulation with protective sleeves or corrugated conduit – pay particular attention to transitions, pass-throughs or similarly problematic spots.
- No tensile load on the cables – use strain relief or cable ties with mounting points where needed. Also remember that certain vehicle parts can move, especially if your vehicle can twist between the cab and the habitation box. If cables are routed here, particular caution is needed.
Wrong Choice of Cable
Solid cables, as are common in house building, have no place in vehicle conversions. They are susceptible to vibration and movement while driving and can break.
For wiring in a camper, flexible automotive cables of type FLY or FLRY type B are particularly well suited – for several reasons.
They consist of fine copper strands that are much more flexible. This makes them resistant to the constant vibration, movement and shocks while driving. Cable breaks can thus be effectively avoided.
The flexible cables also score points when it comes to routing: they are easy to run around tight radii, lay behind furniture and bundle neatly – a decisive advantage in the often very limited installation spaces of a camper. At the same time, they meet all safety-relevant requirements: they are temperature-resistant from –40 °C to +85 °C (briefly even up to +105 °C), resistant to oils and fuels, and approved for vehicles according to DIN ISO 6722.
Thanks to their robust, flame-retardant insulation, FLY/FLRY cables can be stripped cleanly and reliably crimped with wire end ferrules.

Flexible automotive cable FLY/FLRY type B in cross-sections from 0.75 to 70 sqmm.
Perfect for wiring in a camper and motorhome.
Insufficient Cable Cross-Section
One of the most common wiring mistakes in a camper is choosing too small a cable cross-section. This can lead to massive power losses, overheated cables and, in the worst case, cable fires.
The smaller the cable cross-section, the higher the resistance – and the more voltage is lost on the way to the consumer. That means devices such as refrigerators, water pumps or lighting do not get the full operating voltage, run inefficiently or shut down. It gets even more critical with high-current consumers such as inverters, DC-DC chargers or solar charge controllers that quickly draw 50 A or more – here heating rises quickly with cables that are too thin.
The problem affects not only the positive cables but also the negative cables, which are often overlooked. Here too, the cross-section must match the current load and cable length – because the return path is just as much part of the circuit.
Every cable should therefore be carefully sized. Besides the current, the cable length (outward and return path!), the permissible voltage drop and the intended use also play a role.
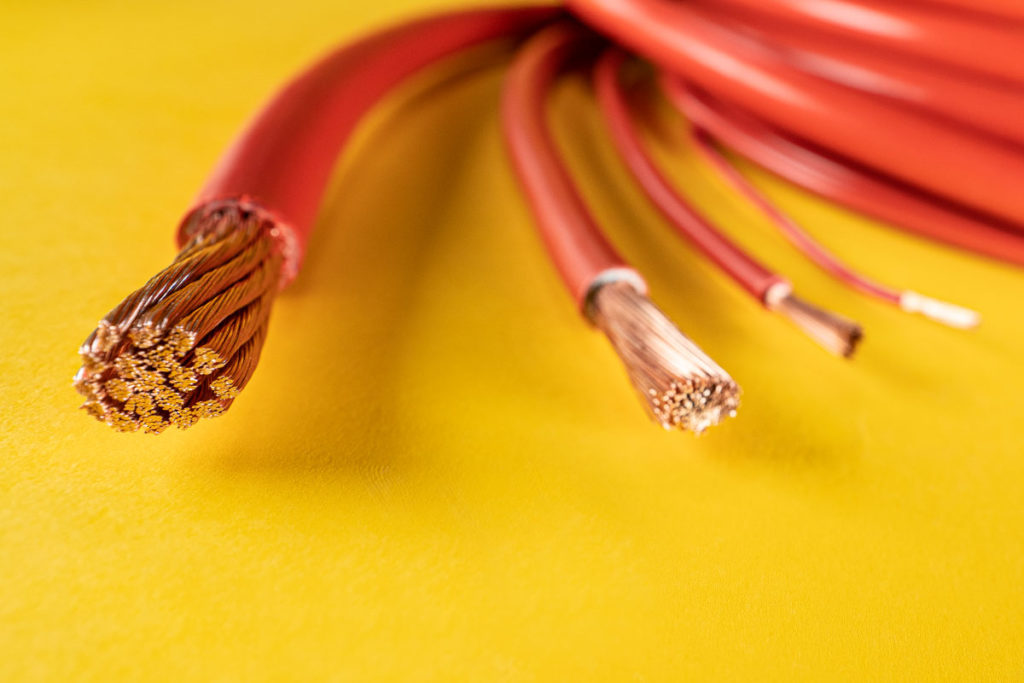
In our detailed article Calculating Cable Cross-Section – Understanding the Formula and Judging the Result you will find an easy-to-understand guide and concrete tables that you can use to wire your camper safely.
Update, October 2026:
To make your work easier or to check your calculations, feel free to use the new tigerexped cable and fuse calculator. Whether routed individually or together with other cables in a cable duct: with our cable and fuse calculator you can include these conditions directly in your planning. Based on your input, it determines the required cable cross-section and a suitable fuse.
Messy Wiring and Cable Spaghetti
A typical problem with wiring in a camper – the effect of insufficiently labeled cables and a confusing layout is underestimated. Even if often only the first time, because the frustration (and with it the learning effect) can be high. So it is best to make sure already with your first wiring to avoid cable spaghetti.
Structured planning and a clean separation of circuits is the first step toward reliable electrics that are easy to maintain and expand. When routing the cables, make sure of a clear structure and color coding, at least to distinguish between plus and minus.
Use cable guides to secure the bundles.
At least as important is the clear labeling of every circuit – both at the fuse and on the cables themselves, ideally at both ends. This creates transparency and helps you (or anyone else) to still recognize after years which consumer is protected by which cable.
Well-thought-out components such as the tigerexped central electrics unit come with sticker sheets for labeling right away – so fuses and circuits can be marked cleanly and permanently, without having to fall back on makeshift solutions.
The result is not only visually appealing but above all safer and easier to maintain.
Faulty or Unsafe Connections
Soldered connections are taboo in a camper, as they are rigid and prone to breaking. Screw connections must be properly prepared by professionally crimping cable lugs or wire end ferrules, otherwise individual fine wires can splay out or break.
Cable lugs – especially ring or fork lugs – are a safe and professional alternative to screwing stranded cables in directly. Here too: professional crimping is essential so that the strands get a firm hold in the lug. If this is done correctly, the cable lug provides a large contact area and a stable connection that cannot work loose through vibration.
Choosing the right one is important here too: the cable lug must fit both the cable cross-section and the terminal size (screw).
When choosing cable lugs, also pay attention to the enormously different qualities offered on the market. The difference between cheap (often “hardware store quality”) and high-quality cable lugs often lies hidden – but becomes clearly noticeable in use at the latest. Professional-grade cable lugs are made of highly conductive, often tin-plated copper, which ensures low contact resistance and reliable power transmission. They can also be crimped cleanly and firmly and withstand vibration. Cheap variants, on the other hand, are often made of inferior material that is difficult to work with, corrodes faster and can thus lead to unsafe connections or heat problems.
Our tip: where possible, choose components with tool-free clamp terminals. They allow a quick, clean and safe connection entirely without screws or crimping tools. That not only reduces installation effort considerably but also minimizes sources of error from loose screws or poorly crimped cables. The integrated spring mechanisms hold stranded wires reliably – vibration-proof and maintenance-free. Especially on the road, this makes it easy and flexible to work while achieving a professional result at the same time.
Missing or Wrongly Sized Fuses
Every circuit must be fused to match the cable cross-section. It is above all missing or oversized fuses that are dangerous.
A fuse that is too weak trips earlier (which does not cause a fire), but can lead to unnecessary and annoying shutdowns.
The fire hazard arises when fuses that are too strong are used and the cable is not protected in time in case of overload, meaning the fuse does not trip.

For choosing the right fuse size, you will find a detailed guide here: Choosing the Right Fuse Size in a 12V Electrical System
Problems With 230V Installations – This Is Where It Gets Life-Threatening
Combining a 12-volt on-board system with a 230-volt installation in a camper is quite normal these days: inverters, shore power connections, chargers or household appliances such as induction cooktops make life on board more comfortable. But with comfort comes responsibility – because dealing with 230 V is not a DIY topic but a serious safety issue with potentially life-threatening consequences.
A particularly common mistake is improper earthing of inverters with earthing-contact sockets. If the protective conductor is not correctly routed to the body ground point and the connecting link between neutral conductor (N) and protective conductor (PE) is also missing in the inverter output, an RCD (residual current device) cannot trip in the event of a fault. The result: with insulation damage or fault currents there is an acute risk of electric shock!
Further risks arise from faulty CEE feed-ins, unsuitable connection cables or home-made adapters. What is required is, for example, rubber-sheathed cable with a sufficient cross-section (usually 3×2.5 mm², H07RN-F) and a tested feed-in via standardized CEE connectors.
Clear Separation: Never Run 12V and 230V Cables Together!
There are also clear rules for cable routing: 12/24 volt and 230 volt cables should always be routed separately and must not go in the same cable duct! Routing them together is theoretically only permissible if all conductors are insulated for the highest voltage present in the duct or a suitable divider is in place – but for the sake of completeness you had better forget that information and simply separate the cables right away.
The conductors must also be correctly color-coded – at 230 V that means, for example, brown or black for phase, blue for neutral and green/yellow for the protective conductor. Red 12 volt cables have absolutely no business in a 230-volt system.
RCD and Circuit Breaker: Mandatory for Safe 230V Installations
Every CEE shore power feed-in requires an RCD (residual current device) with a maximum tripping current of 30 mA as well as a two-pole 16A circuit breaker (MCB), both mandatory. These two functions can be combined in one device – the so-called RCBO (Residual Current Circuit Breaker with Overload protection).
RCBO devices come in two versions:
- 2-pole (2P+N): for use directly behind the CEE shore power connection
- 1P+N: for operation after the inverter, when earthing-contact sockets are used
You will find suitable consumer units for both variants here:
1P+N / 2P+N consumer unit
But an RCD is also absolutely required in inverter operation as soon as earthing-contact sockets are used. Without it there is an acute risk of electric shock in the event of insulation faults or defects!
Also necessary:
- Circuit breaker (MCB) or RCBO 1P+N to protect the sockets
- Only tested and certified components (CE or VDE marking)
- Correctly fused and professionally installed sockets
❗ Important: Work on 230 V systems may be carried out exclusively by qualified electricians. If you install the system as a layperson, it must be inspected and approved by a qualified person before commissioning – for your own safety and that of your fellow travelers. The initial inspection and acceptance is required by law from a qualified electrician under DIN VDE 0100-600 (or the current standards of the DIN VDE 0100 series, as applicable).

Such a 1- or 2-pole consumer unit is perfectly suited for standard-compliant protection and distribution of 230 V in a camper – for example for RCD/MCB combinations directly after the CEE feed-in or behind the inverter. It enables a safe, clear and clean installation according to VDE guidelines.
Underestimated Cable Requirements
It sounds like an annoying trifle, but many people greatly underestimate the cable length actually needed. Not a technical problem if you pause the build and simply reorder – but in practice, cable lengths ordered too short often lead to untidy solutions and subsequent improvisation. Try to avoid this from the start!
Common Wiring Problems – at a Glance
| Problem | Cause / risk | Solution / recommendation |
| Lack of space & overheating | Installation spaces that are too tight or insulated, missing ventilation | Ensure enough air circulation, keep distance from heat sources, install devices so they stay accessible |
| No mechanical protection | Chafing cables, crushing, strain during movement | Run cables through protective sleeves, consider movable vehicle parts, use strain relief |
| Wrong cable type | Use of solid cables | Use only flexible automotive cables (e.g. FLY/FLRY type B) according to ISO 6722 |
| Cable cross-section too small | Voltage loss, overheating, fire hazard | Calculate cross-section correctly (incl. cable length & current), see: Calculating Cable Cross-Section – Understanding the Formula and Judging the Result |
| Cable spaghetti & confusing cable routing | Troubleshooting nearly impossible, untidy look | Structure cables, color-code them, use cable guides, label circuits consistently |
| Missing labeling | Mix-ups & long troubleshooting | Label every cable and fuse clearly – e.g. with the supplied stickers |
| Faulty connections | Breakage, loose contacts, burnt connections and terminals | No solder joints, use only suitable clamp connections or crimped wire end ferrules / cable lugs |
| Missing or wrong fuses | Fire risk or unprotected cables | Fuse every cable to match the load, follow the guide to choosing fuses |
| Dangerous 230 V installation | Risk of electric shock, not legally permissible | Have it planned/approved only by a professional, use RCD & MCB or RCBO, separate routing of 12 V/230 V cables |
| Underestimated cable requirements | Improvised or untidy solutions | Calculate cable lengths generously, plan with a reserve |
Conclusion
The electrical system in a camper is far more than just a collection of cables and fuses – it is the foundation for comfort, safety and independence on the road. Anyone who plans carefully here, chooses the right components and avoids typical mistakes creates a system that works reliably and remains expandable and maintainable even after years.
Even if the sheer number of details may seem daunting at first: with a clear concept, practical information and well-thought-out accessories, much is easier to implement than it appears at first glance. And that is exactly where we want to support you – with know-how and decades of practical experience, suitable products, complete electrical kits and personal advice.
Did these tips on wiring in a camper and motorhome help you? Then share them with like-minded people and friends who are also working on their camper conversion.
These topics might also interest you:


