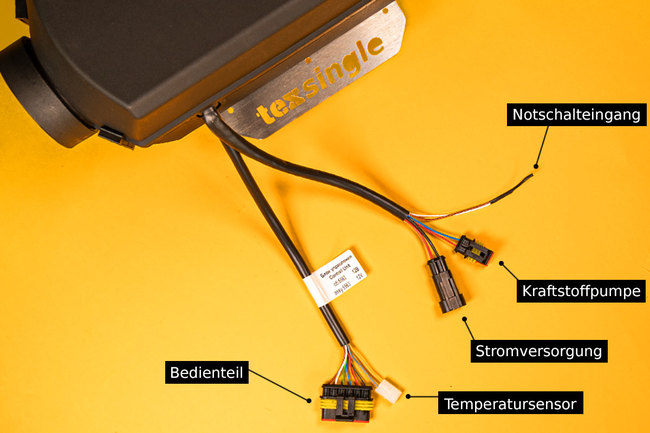
Underfloor mounting of auxiliary heaters such as the Autoterm Air 2D and 4D looks very attractive to many people, especially in smaller campers – the heater doesn’t take up any space inside, and the operating noise “stays outside”. So why not simply install the heater underfloor?
Our answer in customer support is often: “Better not!”
Exceptions are vehicles like the VW T5, T6 or a T4 with a previously installed Eberspächer D3L. These models offer good installation locations with splash-protected areas and workable air routing (see our articles Retrofitting an Autoterm Auxiliary Heater Underfloor in a VW T5 / T6 and Replacing the Eberspächer D3L in a VW T4).
For all other vehicle types, from the Ducato and Jumper to minivans such as the Caddy, there are specific aspects to consider when underfloor mounting is on the table. We’ll go into these in more detail below.
Why Underfloor Mounting at All?
As mentioned, lack of space and the operating noise of the heater are in most cases the main reasons for wanting to banish it outside. Obvious in theory – not quite so simple in practice.
Reducing Noise
The assumption that the heater is perceived as quieter inside the vehicle when it is mounted outside is a fallacy.
The fan noise is carried into the interior through the air ducting. Silencers such as the Schalfgut silencer (preferably on the intake side) help much more – but they are easier to integrate into the air ducting inside the vehicle than outside.
Solving Space Problems
Especially in small vehicles such as micro campers or already fully built-out vans, underfloor mounting seems like the solution. But there are often unused installation spots in the vehicle that don’t need much space and avoid the downsides of underfloor mounting. Examples are:
- under the passenger seat
- across the vehicle behind the seats
- in the area of the step
Here are two nice examples of a space-saving heater installation in a minivan as an alternative to underfloor mounting:


Example 2 in a Toyota Hiace:

What Makes Underfloor Mounting So Demanding?
Underfloor mounting of an auxiliary heater brings special challenges that are considerably more involved than an interior installation.
Above all, environmental influences and technical requirements call for careful planning and execution to ensure the function and longevity of the heater.
Moisture, Dirt and Splash Water
Auxiliary heaters mounted under the vehicle are exposed much more to dirt, moisture and temperature swings. A protective stainless steel box such as the TEXBOX2 is therefore essential. But even this box doesn’t offer complete protection, especially on off-road trips or river crossings.
Damage from water or corrosion usually means an economic total loss and is not covered by the warranty.
Salt water, which occurs not only at beaches but in almost every winter, makes the problem immensely worse.

Warm Air Routing
The air heater has to be able to “breathe out” unhindered.
Flow resistance from tight bends or sharp kinks in the warm air routing must be avoided, as it can lead to heat buildup that reduces heating output or even damages the heater.
Because with underfloor mounting the air duct usually has to be routed up into the interior right next to the heater, such bends are often hard to avoid here.
Longer air routing also means the warm air cools down before it reaches the interior. Especially when winter camping, the living space then stays insufficiently heated.
Air Intake
With underfloor mounting of the auxiliary heater, not just one opening in the vehicle is needed to carry the air warmed by the heater into the interior. What is often forgotten is the air intake – it requires a second large hole for the intake hose to pass through.
You may now be wondering why you can’t simply draw in outside air. There are several reasons for this:
Efficiency and Economy
For maximum efficiency, the heater should be run on the recirculation principle. That means air is drawn in from the interior, heated and released back into the interior.
As you can easily see, it is simpler and uses less fuel to keep an already warmed space at temperature than to constantly heat air that is as cold as possible.
The lower the outside temperature, the more important this point becomes. It is physically impossible to draw in air at -20°C and reach a delta of 75°C. The vehicle will therefore be insufficiently heated even at the unit’s highest power setting.
Possible Damage to the Heater
According to the manual, the air intake must come from a “clean air” area. One reason, among others, is that moisture drawn in (fog, splash water, snow) damages the heater.
Constantly drawing in cold outside air also means the heat exchanger is always cooled from one side and therefore doesn’t reach the temperatures needed to burn off soot deposits. The heater will coke up faster, which first reduces output. More advanced coking eventually leads to heater failure that can only be fixed by a repair.
Both types of damage are avoidable and therefore not covered by the warranty.

You can download the complete operating manual for the Autoterm Air 2D and Air 4D auxiliary heaters here, so you can plan your installation well in advance:
Danger to Life from Exhaust Gases
By far the most serious drawback of drawing in outside air is the possibility of drawing in exhaust gases, which are then carried into the interior with the warm air.
Wind eddies or running engines of other vehicles nearby create an acute risk of carbon monoxide poisoning!
The Argument “Fresh Air Through Outside Intake”
In customer service we often hear the idea of deliberately drawing in air from outside to bring fresh air into the vehicle. This only works to a limited extent, and as just discussed, you must make sure that clean air is drawn in from outside.
Using a control flap to switch between inside and outside intake could be a solution. However, that takes us far from the topic of underfloor mounting and will therefore be covered elsewhere.
We always recommend drawing in air from inside and using cross ventilation to bring fresh air into the vehicle and move moisture out of it.
If you factor this issue into your build concept from the start, 2 roof vents, each with a fan, can work wonders. Warm air has a high humidity saturation and rises. If you create a fresh air draft under the ceiling, the moisture is carried out of the vehicle. Warm air keeps flowing in from below.
Of course this causes some energy loss, but it is considerably lower than having to heat very cold outside air.

Important to know:
To avoid misunderstandings, we’d like to mention here that drawing in room air and drawing in air used for combustion to heat that room air are two completely separate systems.
So in recirculation mode, where room air is drawn in to be heated, the oxygen content of the room air is by no means reduced by the combustion!
You can find out more in our article Suffocating at Night Because of a Diesel Auxiliary Heater? The Fact Check.
Underfloor Mounting of an Auxiliary Heater, Taking All Factors into Account
As we discussed above, many factors have to be considered for a good underfloor installation. Both safety and optimal performance of the heater must be ensured. Here are some tips, recommendations and notes so that an underfloor installation meets these criteria too.
Installation Location and Mounting
Underfloor installations always need an individual mounting solution and quite different brackets for the heater. Depending on vehicle type and model variant, a suitable location has to be found in each case.
It is important to observe the following points:
- The installation location must not damage the vehicle frame, i.e. no holes may be drilled into it to mount components.
- Heat-sensitive vehicle parts must not be put at risk – heater components that get hot, such as the exhaust pipe or mounting bolts, must therefore not be in the immediate vicinity.
Once a suitable location has been found, you should check whether, for example, the 90-degree bracket TEX1705 can be used or whether a completely custom mount is required, for which we may not offer a suitable bracket.
In addition, as already mentioned, the TEXBOX2 (suitable for an Autoterm Air 2D) is needed. It may have to be adapted, for example by adding suitable bolt holes, before it is mounted on the vehicle.
A big advantage of this system is that the heater can be fully pre-mounted and wired inside the TEXBOX before it only needs to be fixed to the 90° bracket under the vehicle.
For the Autoterm Air 4D, unfortunately no suitable box is currently available in our range (as of November 2024). In addition, if a 90-degree bend is needed in the air duct directly behind the unit, the 4D would require enlarging the air duct cross-section to about 160mm to prevent heat buildup. That makes underfloor installation of the 4kW version of the heater even less attractive.
To protect the heater from damage as well as possible, you should choose an installation location between the vehicle frame or the side members. That way the heater is not the lowest point under the vehicle, which considerably reduces the risk of branches or stones damaging it.

Air Routing of Intake & Warm Air
With underfloor mounting, the air routing should be designed as efficiently as possible on both the intake and the warm air side. That means:
- Intake and outlet ducts should be kept as short as possible. Special care is needed with the warm air outlet: if a bend is used directly behind the warm air outlet, the duct cross-section should be enlarged to reduce flow resistance and avoid overheating of the heater.
- Warm air distribution (splitting the air duct with Y-pieces) inside the vehicle is generally not possible with underfloor mounting. The resulting flow resistance would cause the unit to overheat. We therefore recommend letting the warm air flow out directly after the floor opening.
- There are also important points to note on the intake side: heat buildup is less critical here, but flow resistance must still be avoided.
We therefore recommend keeping the intake routing as short and bend-free as possible and attaching it directly at the floor opening. Make sure, however, that the interior air intake point and the warm air outlet are not too close together. Otherwise there is a risk that the heater draws the blown-out warm air back in, which in turn can lead to overheating.
Other Practical Examples and Notes on Underfloor Mounting
Aluminum-laminated air ducts are widely used for air auxiliary heaters. However, since they have a cardboard core, they are only of limited suitability for outdoor use. We recommend using heat-resistant air ducts specifically for outdoor use instead.

For the floor passages, waterproof adapters should be used. They allow a gas-tight bond and provide a secure hose connector both inside and outside.
Be careful with the warm air outlets too: flat air outlets set directly into the floor risk letting small stones, animal hair or other foreign objects get into the heater and damage it. Here we recommend so-called periscope air outlets. They offer minimal flow resistance and can be mounted directly on the floor without the need for a horizontal hole in the floor.
In addition, all connections, both on the unit itself and on the ducting, should be made with stainless steel components (e.g. item numbers 20967 and 19049) to prevent corrosion.

Note for Off-Roaders and Vehicles on Rough Tracks
Despite careful planning and taking all the tips mentioned into account, underfloor mounting remains problematic on off-road vehicles and vehicles used on rough tracks. During river crossings or beach driving, water getting into the heater can hardly be avoided – even a TEXBOX2 is not completely waterproof but protects against splash water.
There is a particular risk with Autoterm air heaters that have an altitude kit (all 2kW and 4kW variants!). This kit uses a pressure sensor with an open membrane that enables dynamic mixture formation for use at high altitudes. However, this membrane is not waterproof. As soon as the sensor gets wet, the unit is irreparably damaged.
For these reasons, we generally advise against underfloor mounting on off-roaders. In the article How to Make Your Autoterm Auxiliary Heater Fit for Overland Travel & Off-Roading, however, we show you how to equip an interior-mounted heater so that it works reliably even in extreme off-road conditions.
When Using the Heater with a Hot Water Boiler
If you also want to run a hot water boiler from the diesel auxiliary heater (see Hot Shower Kit 2.0), you should definitely install both inside the vehicle. Because of the heat losses of the externally routed air ducting, it cannot be guaranteed that the boiler can be heated satisfactorily at low ambient temperatures.
If, despite all the arguments against it, you want to install the heater underfloor and still have hot water from a boiler, use the monoBOIL or duoBOIL variants, which are designed for operation on electricity, or electricity / engine coolant circuit respectively.

Which Hot Water Boiler for Your Travel Vehicle: mono-, duo- or combiBOIL?
More info on the boiler series and how you can use each one.
Conclusion on Underfloor Mounting of Autoterm Air Auxiliary Heaters
Underfloor mounting of auxiliary heaters usually offers hardly any of the hoped-for space savings inside, because of the two openings required, and comes with considerable challenges.
Short air routing with as few bends as possible is essential to avoid flow resistance and overheating of the unit. Warm air distribution within the vehicle is not feasible with this type of installation.
For outdoor mounting, only weatherproof components such as heat-resistant air ducts, waterproof adapters and corrosion-resistant stainless steel parts should be used.
Even so, underfloor mounting remains problematic, especially for off-roaders, since in off-road use water and dirt are very likely to get into the heater and will damage the unit.
Our tip: Check critically whether an interior installation isn’t the better alternative for your vehicle – it is generally more durable, easier to maintain and less susceptible to external influences.
Did you find these thoughts on underfloor mounting of air auxiliary heaters interesting? Then share the article with like-minded people who will surely be glad to read this info too:
These posts on auxiliary heaters in campers might also interest you: