

A self-built van (or any other camper / motorhome / expedition vehicle) is more than just a means of transport. Through your own planning and build, you can create a unique space that perfectly matches your own ideas and travel needs – a feel-good oasis on wheels. From the interior fittings to the practical layout and the materials and colors, every aspect can be designed to your personal taste. You can also keep the costs of your dream camper under control, or lower them, by doing the work yourself.
In this article we take a closer look at the individual cost factors of a van conversion. How much exactly each item costs can vary a lot, and we explain why in each case.
After reading the article, though, you should have an overview and a good basis for putting together an individual budget plan. That way you won’t be surprised by costs you hadn’t considered as the project goes on.
Requirements for a Van Conversion
Unfortunately you need more than a van and the materials that go into it. You need something to work them with, to install them, and a place to do it all.
Tools
Anyone starting a large hands-on project needs tools.
Cordless drill, cutting and grinding tools, wrench set, crimping pliers, hole saws … over the course of the project the number of helpers you need adds up quickly. If you have nothing at all, this can be a considerable cost factor. In most cases, though, anyone taking on a project as big as a van conversion already has some hands-on experience and has collected a tool or two along the way.
It makes sense to team up with like-minded people and help each other out, or to take over used tools at a lower price. One thing should be made very clear, though: even used tools should be tools that work flawlessly. Wear parts such as the blades of a used jigsaw should also be replaced with new ones wherever possible. Nothing is more annoying than a tool that not only makes the work harder, but also ruins the cut edges of your furniture.

Workshop
Where do you want to park the camper during the build? If you can’t use a driveway or garage for the duration of the work, it may be worth considering renting a garage or self-storage unit for it.
Some DIY builders do carry out their project while the vehicle is parked on the street (if where they live allows it) – but that is certainly not a comfortable arrangement. Keep in mind that there is not much room in the vehicle anyway, the material has to be stored as well, and you need free space to work, ideally with a workbench or similar. Many of the materials are also sensitive to weather, and you can’t work outside when it rains.
If you need to rent a garage for your project, make sure you are allowed to carry out all the work you plan to do there. Depending on the circumstances, certain work is sometimes prohibited for safety reasons.
The cost of renting garages and self-storage units that can be used as a workshop varies by region and often includes a minimum rental period, which you should take into account when comparing offers.

Choosing a Vehicle
The first cost factor in your van conversion is of course buying the base vehicle. The cost can vary enormously, depending on factors such as make, model, age, mileage and condition of the vehicle.
It pays not to choose the vehicle on the lowest possible price alone. Above all it should fit your needs and the planned conversion, so that you are happy with it on the road. If the key features of your future travel vehicle miss your requirements, it is almost inevitable that at some point you will consider selling it and buying a more suitable model – and that will certainly be more expensive than choosing a vehicle right away that perhaps costs a bit more up front but meets your wishes.
Keep the following points in mind when choosing:
Space Requirements
How many people will use the camper and for which activities?
Do you need a lot of storage for outdoor gear, bicycles or other sports equipment? Do you need a seating area for eating and relaxing, or are you outside anyway except for sleeping (also think about what you will do when it rains all day long!).
Another crucial criterion: standing height, yes or no …
Vehicle Size and Maneuverability
The size of the vehicle affects the maneuverability and handling of the camper. Larger vehicles offer more interior space but can be harder to maneuver. Especially on narrow roads or when looking for a parking space, excessive vehicle length can be impractical.
Off-Road Capability
If you plan to travel with your camper van off paved roads (on tracks, please not through vegetation!), a certain off-road capability can be important.
Keep in mind that not all vehicles are suited to demanding terrain. If you plan to be on unpaved roads or in remote areas often, you should choose a vehicle with good ground clearance, four-wheel drive and robust off-road features such as differential locks. It should also be easy to repair, and spare parts should be readily available in other countries too.
Amenities
Think about which amenities you would like in your van conversion. Do you value a spacious kitchen unit with a 4-burner stove for preparing elaborate meals, or is a small gas cooker enough for a can of ravioli in the evening? Should it be a large fridge with a freezer compartment, or is a small cool box enough? Is a permanently installed shower cubicle an essential part of your conversion plan?
Also think about comfort features such as air conditioning, heating and sufficient ventilation in the vehicle. If you need to install windows, each one will set you back approx. 200 to 700 euros (depending on size and manufacturer), and matching pleated blinds / insect screens add roughly 100 to 350 euros on top.
Define your priorities and check whether the chosen vehicle can offer these amenities, or whether they can be realized as part of the conversion.
Running Costs and Fuel Consumption
When planning your van conversion project, also consider the follow-up costs. These are the running costs of the vehicle such as insurance and taxes, including fuel consumption and possible spare parts and repair costs.
Larger and heavier vehicles tend to use more fuel. Age also plays a role. If you plan to drive long distances often, lower fuel consumption can matter a lot financially (and for the environment).

Van Conversion Costs
One thing up front: the costs of converting a van, or campers and motorhomes in general, can vary widely – depending on how extensively you want to equip the vehicle.
When choosing the vehicle we already touched on the fact that requirements can range from a simple place to sleep for outdoor activities to a home replacement for a whole family. The costs involved naturally differ just as much.
Here we want to go through the individual items, partly so you don’t forget any big items in your planning and then face more than you expected. For most items we also give a small budget guide.
Insulation and Paneling
Your camper should get a certain amount of insulation so you can keep a pleasant climate inside while it is bitterly cold or far too hot outside.
Our recommendation is a closed-cell material that cannot go moldy. Recently, though, many DIY builders have also been trying alternative insulation materials made of wool, wood fiber or similar. With such materials in particular, it is advisable to study real-world experience and correct application in detail.
With long-proven closed-cell insulation materials available as flexible mats, you can assume a thickness of between 2 and 5 cm as a rough guideline for effective insulation.
The cost of insulation material varies by type, quality and manufacturer. In general you can expect a price of around 10-30 euros per square meter of insulation material.
In addition to the cost of the insulation material itself, you should also factor in the price of adhesives for installation, which can make up a not insignificant cost. On top of that come, possibly, fasteners, a substructure or a vapor barrier film, depending on the material you choose.
With an area to insulate of, for example, 30 square meters (roughly a mid-size van) and total costs of 25 euros per square meter, the insulation comes to a budget of 750 euros – FOR EXAMPLE(!).
Wall and ceiling surfaces as well as the floor still need to be covered with a suitable lining. For walls, thin poplar plywood and felt are often used; for the floor, a simple, robust PVC covering is a common, practical and inexpensive solution. There is hardly any limit to your imagination here, though, and real cork flooring is just as common as click laminate and industrial carpet.
Electrical Installation (Solar System, Batteries, Wiring)
Electrics is one of the items with the widest financial range.
It all depends on how you want to use your camper. Do you want to make it your home for a long-term trip without giving up home luxuries like an induction hob or a powerful hair dryer? Or do you just need a bit of light on board in the evening after a climbing trip …
But it is not only the consumption of energy: recharging also needs to be considered with the appropriate options. Charging via shore power (perhaps not only at 230 but also 110 volts on a Pan-American trip), via alternator and (a lot or a little) solar – a wide range of cost factors comes your way here, depending on what you want to use.
For many DIY builders, planning the electrical system in particular is a closed book, because there are so many components and electrical units that a layperson doesn’t even understand what they actually do, so it really is hard to come up with a concept.
If that sounds like you, you have landed in exactly the right place, because electrical systems in particular are our specialty. For the “normal vanlife vacation” you get complete kits from us, put together by experienced travelers so that everything works perfectly together. You can then still adapt them to your personal needs in the configurator, but you can no longer get anything wrong.
For higher requirements (e.g. the expedition vehicle for a world trip, but also the heavily used van with an induction hob), our technicians put together the optimal system for you in a personal conversation. Martin and Lars explain all the details of this consulting model, and what you should end up with, in this video:
Whether a small kit to configure yourself or a large one after personal consultation: you get an installation guide and an individual, simplified wiring diagram so that installing it yourself succeeds.
But back to the costs of a DIY camper conversion. We have already established that different budgets have to be planned for the electrical system, but how can you picture the price ranges roughly?
Example: Van Conversion for Normal Vanlife Needs
Let’s assume you want to equip a camper van for long weekends and a two-week vacation. A leisure battery should have enough capacity to charge your camera, to watch a movie on the tablet in the evening without the lights going out, and to keep your drinks and supplies reliably cold.
It should also be able to run with a certain degree of autonomy, meaning you don’t want to depend on charging your batteries at the campsite every night. Charging daily via the alternator is not a suitable concept either, because you also want to stay 2-3 days in the same place. With these requirements, our configurator gets you to package prices from approx. 1900 euros – including solar and a high-quality LiFePo4 battery. Wiring and the desired number of switches and sockets still have to be added.
Example: Vehicle for Long-Term / Long-Distance Travel or Living / Working
For an “expedition vehicle” with higher demands, things look quite different again. If you want to live in the vehicle alone or even with a whole family and not give up the comfort of an induction hob, run a powerful computer plus Starlink to move the office onto the roads of the world, and run all sorts of gadgets such as a games console or perhaps a washing machine, you have to prepare for an enormous increase in the cost of the electrics. We assume here that autonomous operation for several days is mandatory.
Solar and battery capacity have to be increased many times over for these demands, and an output of 1.5 kW solar plus 600 watt-hours of LiFePo4 battery is commonplace on such vehicles. The price range can very quickly reach 12,000 – 15,000 euros.
If you install a 230V distribution in your camper, you also have to include the cost of the inspection by an electrician.

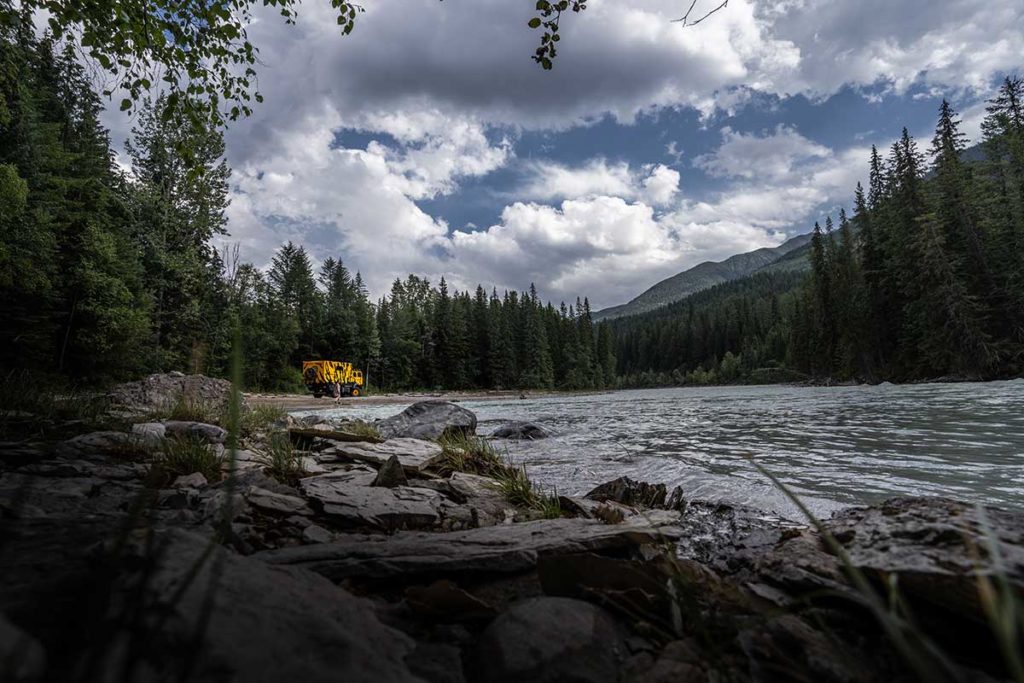
Do you want to be self-sufficient and enjoy great, remote places without power problems?
You can achieve that with different concepts. The question is just: which one suits you and the way you travel?
You can find out more in our article Off-Grid in Your Camper – Which Power Concept Suits You.
Request your personal consultation with one of our experts here to have an electrical system tailored to your needs, or configure a “basic” complete kit.
Furniture Building
Building furniture is a fairly demanding job. That is why many DIY builders opt for ready-made modular furniture, which is now offered by numerous manufacturers.
For a DIY build, a system that helps you build at right angles can be useful. This is the easiest way to make sure cabinets and storage compartments close as intended afterwards.
In our range you will find STECK & WEG for this, an aluminum rail system that makes furniture building a bit like LEGO. The elements are cut to size according to a plan and simply plugged together using various corner pieces to create any shape you want. That works around wheel arches, around corners … all your interior wishes can be realized with it relatively easily.
Besides the rail system you will also need paneling material, hinges and latches.
With a system like Steck & Weg, even a layperson can build professional, long-lasting furniture for very individual ideas. However, for a build like the one in the following pictures, you have to expect a cost of around 3,000 to 4,000 euros despite building it yourself.


Furniture build with the STECK + WEG system
Heating
There are several ways to heat a camper.
Diesel Auxiliary Heaters
This type of heater uses fuel from the vehicle tank to produce heat. They are effective and can often be used both to heat the interior and (as we will see further below) to heat water.
High-quality heaters of this kind, such as the Autoterm auxiliary heaters, are easy and thanks to the e-mark even installable without a TÜV inspection by a layperson.
Attention: Various cheap suppliers from the Far East are also available on the German market that do not meet European safety standards or certifications.
Propane Heaters
Propane heaters are often standard in motorhomes and caravans from large manufacturers. Propane as a fuel has to be carried in a gas bottle (or a separate propane tank).
The heaters are very quiet and pleasant in operation, but they require regular inspections and maintenance to make sure the gas lines are still tight and the burners work properly so that gas cannot escape unintentionally (please install a gas detector in the vehicle!).
Swapping or refilling gas bottles can be difficult abroad – the systems / connections differ, and so do the safety regulations for handling and carrying gas.
Electric Heaters
Electric heaters are a simple solution, but not an efficient method when it comes to heating a camper. They can occasionally be used to supplement other heating methods if a power source such as a campsite hook-up is available. It is better, however, to size the chosen heater sufficiently so that additional heating isn’t necessary.
Wood Stoves or Oil / Diesel Stoves
Stoves can create a cozy atmosphere in self-built campers. However, they require installing a chimney to carry away smoke and exhaust gases, and a safety distance to all walls and other flammable materials.
They are less suited as the sole heat source.

For a campfire atmosphere with dancing flames in your camper – plenty of information on installing and operating the Sibirien diesel stove is available here:
Our Recommendation
Because of the simplicity of the system, the convenient fuel supply from the vehicle tank, the safety and ease of repair, as well as a very good price-performance ratio, we recommend diesel auxiliary heaters – not only for DIY campers.
For a mid-size camper with average insulation, a complete system is available for under 750 euros.

Our complete heater kits, consisting of an Autoterm diesel auxiliary heater and all the material you need for a finished, installed, working system, make it easy for you. Find out more here:
- Which heating output do you really need? You can learn more about sizing the heating output using the TWIN Kit, which consists of 2 x 2 kW heating output.
- Get an idea of how easy installation is with our customers’ video installation documentation
Our most popular kit, which fits 99% of all campers and is named accordingly.
Water Installation (Water Tank, Faucets, Shower, Toilet System)
The water supply in your future camper can be a simple water canister with a drain tap for 20 euros, or a pressurized water system with a hot shower and always freshly filtered drinking water. Between these two variants there are of course plenty of gradations again. On this point, however, a fairly clear trend is visible: by far most DIY builders with vehicles from van size up opt for hot water heating and a filter system, so they can drink the water from the fresh water tanks without a second thought.
As basic equipment you of course need a fresh water and grey water tank, as well as a hose system and a pump that circulates it all. When buying, make sure the hoses are suitable for drinking water (no garden hoses!) if you want to use the water from your system for drinking and cooking. The pump should also be able to build up enough pressure for any filtering.
If you want to have water supplies for several days on board, you should by no means forget the fresh water and grey water tank components in your budget planning, since tanks (depending on size) are a relatively expensive purchase.
Hot Water Heating
We recommend hot water heating that works independently of the heater, because with combination units you sometimes end up sitting in the cold just because something is wrong with the hot water boiler. Not being able to take a hot shower is one thing. Not being able to heat on an icy cold night is another.
That is why we developed the first and original Hot Shower Kit. A diesel auxiliary heater produces hot water as a waste product, so to speak. If you don’t want to switch the heater on but still need hot water, an electric heating element in the boiler can be used as well.
With a heating output of 2, 4 or 2 x 2 kW, this kit is suitable for every application – if you only want heating and no hot water, you can of course install the heaters without the boiler too. Another advantage: the combination of an air auxiliary heater and hot water from heater air costs far less than a combination unit.
A kit for a mid-size camper with normally sized insulation comes in at around 1300 euros. On top of that come your water outlets, i.e. faucets and a shower, e.g. from Queensize Camper.

Drinking Water Filtration
Buying drinking water in bottles and carrying it in addition to the water supplies already in the camper is completely unnecessary – the space can certainly be put to better use, quite apart from the hauling and the needless plastic. With suitable filtration, the water from the fresh water tanks can be drunk without worry, no matter which tap or source you filled it from.
There are various ways to filter the water:
Mechanical Filtration with Germ Barrier and Activated Carbon
This type of water filtration is very popular, widely used and safe. It removes disease-causing germs and bacteria, chlorine, sediments, but also residues of fertilizers, pesticides or medication from the water. The filters are affordable, easy to install and need no electricity (apart, of course, from running the water system / a pump itself). The cartridges do have to be replaced regularly, however, to maintain filter performance.
Reverse Osmosis (RO) Systems
RO systems produce particularly pure drinking water, which however should be remineralized, because the vital minerals are removed as well. Such systems cost more to buy, need more maintenance and use electricity. One of the biggest drawbacks, though: they waste a considerable amount of the water in the filtration process, which is lost as grey water.
UV Sterilization
UV sterilization systems use ultraviolet light to kill bacteria, viruses and other microorganisms. They are effective and need no chemicals. However, UV systems depend on a reliable power source and cannot remove heavy metals, chemicals or other contaminants. In addition, this way of rendering germs harmless only works in clear water, not with turbidity.
Our Recommendation
As the simplest and safest way of filtering water, we recommend mechanical filtration, ideally after the tank, to account for possible recontamination in the system.
The Fusion + Protect installation set made of high-quality components from the manufacturer Alb Filter, for example, is available from us for 345 euros (as of June 2023).

What exactly is so-called recontamination, and does the water filter set that is most commonly recommended also suit your needs? You can find out more here:
Toilet
Choosing the right toilet depends on individual needs and preferences, but factors such as water availability, disposal options and environmental aspects should also be considered.
Cassette Toilets
Cassette toilets are still often found in “off-the-shelf” motorhomes, even though their popularity keeps falling and the number of alternatives grows. They consist of a tank for flush water, the toilet itself and a container mounted under the seat (the cassette) that holds the waste and the grey water. The cassette can be removed and emptied at a designated disposal station.
To reduce odors and break down the waste in the water, chemicals are usually used. Since these are very harmful to the environment, many owners of cassette toilets now do without them. Another drawback is that flush water has to be carried, so the cassette also fills up quickly and a suitable disposal station has to be found.
Separating, or Dry Toilets and Composting Toilets
Separating toilets are a more environmentally friendly option. They separate urine and solids – so there are no nasty odors. Usually a small fan is used to carry away moisture that might otherwise condense – as a side effect the toilet becomes completely odorless, since all odors that arise are carried outside. Disposal is considerably easier with separating toilets. Separating toilets need no chemicals and are very easy to maintain.
Suitable separating inserts for separating urine and solids, or complete dry toilet kits for DIY builders, are available from numerous suppliers. A simple toilet that can be tailored to the space and design in your van costs around 150 euros.
With from 150 to 200 euros, however, you can also buy inexpensive, ready-made versions.
Composting Toilets
Composting toilets are also a water-free and chemical-free option. Here too urine and solids are separated, and coconut fiber or similar is used to get the solids composting right in the toilet.
Because of the greater effort (a crank system is needed to mix fibers and solids), composting toilets are generally not built by the van converters themselves but rather bought ready-made. For a good toilet of this kind, you can quickly budget around 1,200 euros.
Accessories / Storage
What should come along on vacation?
Carried equipment such as bicycles, needs to be stowed and secured safely. A van bike rack puts from about 500 euros on the list; similar items would be airline rails and boxes for individual storage and securing systems.
An awning or a tarp for protection from sun and rain is also useful accessory, and here too you can quickly spend several hundred euros.
A certain amount of equipment such as chairs, a table, and dishes, pots etc. for daily needs is mandatory. And then: off you go!

Conclusion on Van Conversions and Their Costs
Compared with buying a ready-converted vehicle, a DIY conversion can save costs. It does take a lot of weighing up, comparing and researching, though, because a DIY conversion can actually end up more expensive than buying ready-made – there are almost no limits to creativity, or to costs, in a van conversion. On top of that come many hours of hands-on work and surely, now and then, failure, frustration and doing it over again. A DIY camper conversion always takes longer than planned, a truth that almost anyone who has completed such a project would sign.
But what you get is priceless: the freedom to realize your travel dreams in a completely individual home on wheels. At the end of the day, that is what makes a DIY camper conversion truly worthwhile – the precious chance to enjoy life to the fullest and make the world our home.
Did this article help you? Why not recommend it to friends and like-minded people who would be glad of this information, or save it for later!
You might also like these articles:


