
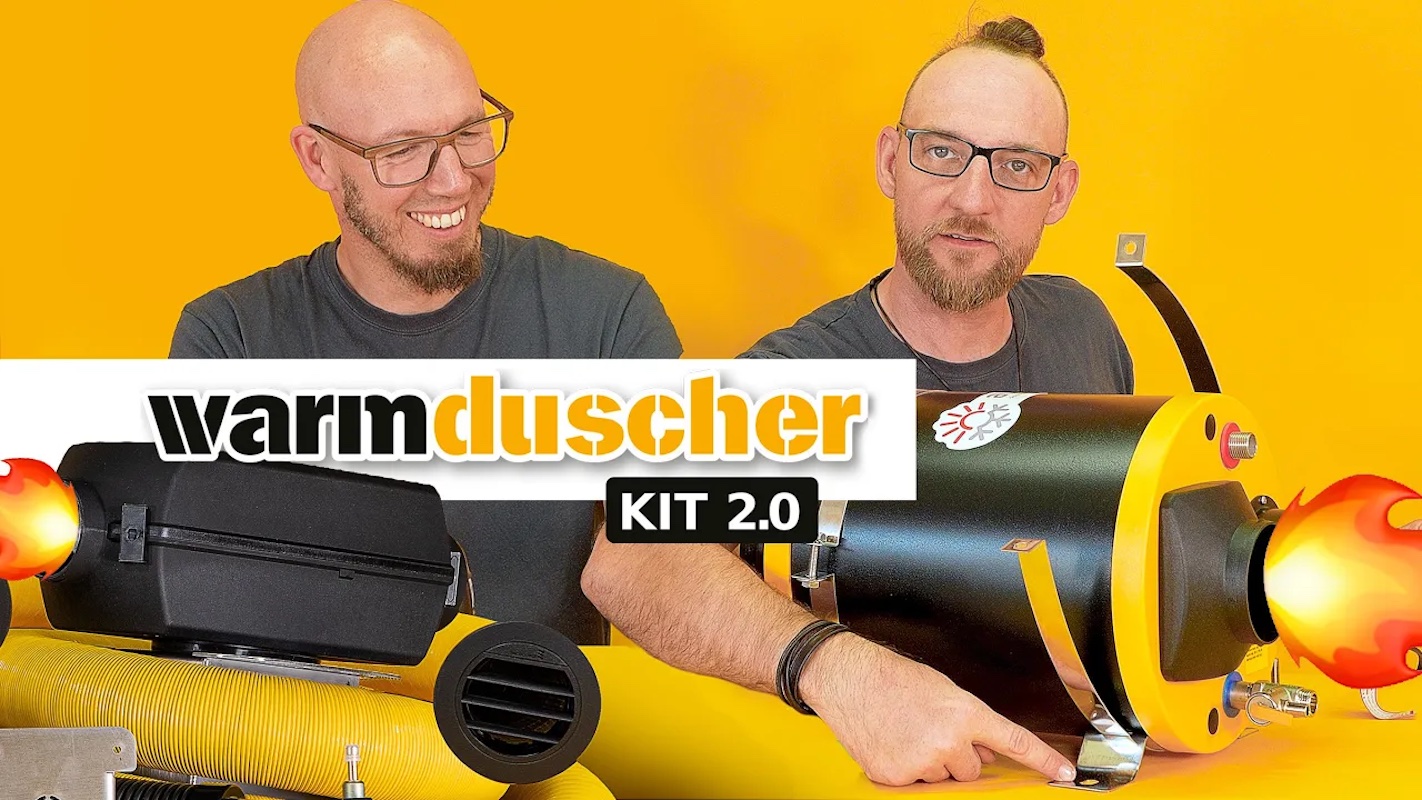
Are you interested in the Hot Shower Kit 2.0, or have you even bought one already? A good decision, because thanks to the high quality of its components the Hot Shower Kit 2.0 will be a reliable companion on your travels for a long time, and you will surely soon not want to be without its exclusive features.
In addition to the Autoterm auxiliary heater and the combiBOIL water boiler, this kit gives you everything you need to install and connect the two main components.
Note:
Installing the Hot Shower Kit 2.0 is fairly easy even for DIY beginners.
All installations do require a well-stocked workshop and corresponding
installation material, such as thread sealant, screws or cable ties.
System Layout of the Hot Shower Kit 2.0
The Hot Shower Kit 2.0 consists of two main components that work independently of each other, which you can choose according to your wishes and individual needs:
A: Autoterm Auxiliary Heater
Depending on your power needs, the kit can be run with a 2kW, 4kW or 2x2kW (TWIN kit) Autoterm diesel auxiliary heater.
B: combiBOIL Water Boiler
Besides the heater, the kit includes a combiBOIL water boiler with 7l, 9l or 12l capacity. It comes with an Autoterm Comfort Boiler Control heater control panel, which lets you monitor and control the whole system.

How It Works
With the Hot Shower Kit 2.0, hot water can be produced in three different ways:
- With an electric heating element.
- Using warm air from an auxiliary heater.
- Via integration into the engine cooling circuit / with a water heater
In addition, a second water loop can be integrated into the system, e.g. for a small, partial underfloor heating or towel radiators.
Please note the information here on this topic as well.
Unboxing, How-To, Tips & Tricks – Video
Installation
The following notes will help you install the components properly. Please follow the instructions carefully so that you end up with a reliably working system.
If you have further questions, our support at info@tigerexped.de is always happy to help.
Connecting Auxiliary Heater and Boiler
To connect the boiler to the heater, first remove the grille attachment from the heater’s warm air outlet (by turning it slightly to the left and pulling).
When using a 2kW heater, the supplied adapter piece (60 to 90mm, item no. 17857) is fitted on both sides of the boiler.
With warm air systems that use 90mm air ducting (e.g. Autoterm Air 4kW), no adapter is needed on the boiler.
The 90mm air hose can now be used to connect the heater’s outlet to the boiler’s warm air inlet. The boiler’s inlet and outlet are identical, so either side can serve as the inlet.
Air Ducting
As is generally the case, all warm air connections should have as little flow resistance as possible. Excessive bends or very long air ducting with many branches must be avoided under all circumstances, as otherwise a backflow of warm air into the heater occurs, which can lead to a safety shutdown.
In total, the length of the air ducting should not exceed 5m, unless special measures to reduce flow resistance (cross-section enlargement, splitting into several parallel runs or similar) have been taken.
The general maxim is: Keep it simple. Even if a 10m air duct run with sufficiently low flow resistance can be achieved – because of heat losses only a “gentle breeze” will arrive at the end of the ducting, so you have to question whether such constructions make sense. Using booster fans, as is done for example with gas heaters, is NOT permitted here.
Water Installation

Important: Installing the Pressure Reducer
If you have a pressure water system, or a system with a submersible pump that has a check valve, a pressure reducer (item 6) must be installed upstream of the boiler.
Suitable adjustable pressure reducers, with and without an integrated pressure gauge, are available under item numbers 36778 and TEX1766 respectively, and, because of differing requirements, both are included with the Hot Shower Kit 2.0.
A safety valve to release any excess pressure that still occurs is already integrated at the factory in combiBOIL water boilers and preset to a release pressure of 3bar.
Tip: Safety Valve vs. Drain Valve
For safe winter storage and longer periods of standstill, combiBOIL is equipped with a drain valve in addition to the safety valve.
The safety valve should not be used to empty the boiler, but the outlets of both valves (safety valve and drain valve) can be connected with the enclosed Y-piece and routed to the outside. A single hole through the cabin floor is then sufficient.
Braided Steel Hose and Thermostatic Mixer
Use the braided steel hose included in the kit (item no. 37283) at position 4 to create a heat-resistant connection between boiler and mixer. Water leaving the boiler can be up to 80 °C hot (depending on the heating method), which can cause thermal deformation of ordinary hoses.
For this reason, install the thermostatic mixer / scald protection included in the kit at position 5 to prevent burns when drawing water.
Integrating a Second Water Loop
If a second water loop is integrated into the system, an expansion tank and a circulation pump are absolutely necessary in it.
Further Installation Notes for the Water Side
To seal the water connections (G1/2″ standard screw thread on the boiler side), use suitable plumbing sealing material (e.g. thread sealing cord).
For hose push-fit connections, use stainless steel clamp-jaw hose clamps that fit perfectly round, such as item no. 36852 (for detachable connections), or so-called single-ear clamps with insert ring (item no. 38118), which, with suitable crimping pliers, likewise lie evenly around the connection.
This is how you protect your vehicle from water damage with the greatest possible safety.

More information on the advantages and disadvantages of different hose clamps, as well as more tips and notes on building a pressure water system, can be found in the following article:
Electrical Connections
If you need basic information on electrical connections, you will find more help here:
- Calculating Cable Cross-Section – Understanding the Formula and Judging the Result
- Choosing the Right Fuse Size in a 12V System
Connecting the Autoterm Heater
Connect the auxiliary heater as directly as possible to the battery or to a 12/24V sub-distribution with adequately sized cable cross-sections.
The heater must not be switched off during operation by a main switch or an automatic undervoltage protection, because it can otherwise be damaged.
Autoterm Comfort Boiler Control
The control unit has an additional connection for the supplied temperature sensor. This is pushed all the way into the temperature sensor sleeve at the boiler’s hot water outlet and secured against slipping out with a cable tie.
With the TWIN kit or an additional thermostat module, further sensors must be inserted into the sleeve. No more than 1 sensor may sit side by side in the sleeve at a time; each further one follows directly behind the previous one, together with its connecting cable.

combiBOIL Electric Heating Element
Attention: 12 and 24V heating elements have no built-in thermostat. This means an external thermostat module must be installed upstream (item no. TEX4275), or you must actively make sure that operation without water is impossible and that it is cut off at 70°C in the boiler at the very latest(!). The external thermostat module for these boiler variants will be available soon.
A 230V heating element can be run directly from shore power, or from an inverter, via the Schuko plug on the boiler.
Optional Accessories to Complete the Pressure Water System
In our shop you will find all the parts you need to complete your pressure water system around the Hot Shower Kit. Here you will find the matching item numbers, as well as the item numbers of the kit’s main system components, at a glance.
Water System Accessories, Available at tigerexped.de
- Pressure water pump with pre-filter and hose nozzles: item no. VAR35901
- Accumulator tank 1l: item no. TEX4425
- Value bundle of pump and accumulator tank: item no. VAR35904
- Drinking water hose, certified, in red and blue: item no. VAR35898
- Pressure reducer without pressure gauge: item no. 36778, with pressure gauge: item no. TEX1766
- Thermostatic mixer scald protection: TEX1764 (included in the kit)
- Thermostat module for 12/24V heating elements: item no. TEX4275
- Stainless steel clamp-jaw hose clamps: item no. 36852
- Single-ear clamps: item no. 18190
- Pliers for single-ear clamps: item no. 19052
- Air duct 60 mm: 16527, 90 mm: 16577
- Drinking water filtration for different requirements: tigerexped.de/wasserfilter
Info on the topic: Which Water Filter Kit Fits Your Needs - High-quality stainless steel sinks, faucets and shower sets: tigerexped.de/Queensize-Camper
- combiBOIL water boiler: VAR35926 (included in the chosen configuration)
- Autoterm auxiliary heater with accessories 2kW: VAR35831, 4kW: VAR35832 (included)
- Autoterm Comfort Boiler Control control panel: 37277 (included depending on the chosen boiler configuration)
You will find more accessories, from the filler neck for the outer wall to the water tap saddle, in our shop category Water Components.

Hot Shower Kit 2.0
The tigerexped team wishes you lots of fun and success with the installation of your Hot Shower Kit 2.0 and lots of enjoyment traveling with it.
Share this installation guide with other build enthusiasts who are interested in a fully integrated heating and hot water system:
These topics might also interest you:


