

Installing a solar system on your motorhome is a great way to generate your own power on the road. In this guide we explain step by step how to mount and correctly connect a solar system, for example one of our handy complete solar kits, on and inside your motorhome.
Whether you only want to install a single solar panel or are planning a setup with several panels, here you will learn how to go about it.
Installing a Solar System: Planning and Preparation
Since you are reading an installation guide, you have probably already decided on a solar system, including its size. If that is not the case, the following articles contain plenty of information to help you with assessing your needs and choosing the right system.
- Energy Use in a Camper – How to Calculate Your Power Needs
- Off-Grid in Your Camper – Which Power Concept Suits You
- How Much Solar for Campers and Motorhomes – Assessing the Influencing Factors Correctly
- Average Solar Yield – What Your Panel Really Delivers
- Temperature Coefficient – Something You Must Consider When Sizing a Solar System
- Solar Panel Efficiency – How Important Is the Figure Really

Complete solar kits from 1 x 100Wp to 2 x 180Wp, with everything you need for the finished installation.
Photo credit: tigerexped installation partner Jan Kuckerts of Kucki’s Camper Garage. If you don’t feel confident installing the solar system yourself, or simply don’t have the time, this master vehicle service technician with many years of experience in camper and expedition vehicle builds is an ideal contact in the Bonn-Cologne-Aachen area.
Getting Parts and Tools Ready
If you have chosen one of our all-inclusive complete kits, all components for your motorhome solar system are already included in the right size, including mounting corners, fuses and adhesive kit. All you need is a few tools at hand, including:
- Cordless screwdriver
- Drill bits
- Side cutters
- Screwdrivers
- Crimping pliers
- Sandpaper
Preparing the Installation
Depending on the number and wiring of your solar panels, the installation can differ slightly. In general, a distinction is made between a single installation and, with several solar panels, a series or parallel connection; depending on the components, one or the other may be necessary or bring a slight advantage under certain conditions. The tigerexped complete solar kits are always equipped accordingly.
Before you start the actual installation, there are a few preparations to make.
Deciding Where to Mount the Solar Charge Controller
The solar charge controller should be mounted as close to the battery as possible and ideally hanging. Avoid mounting it on the floor: the controller is cooled by a heat sink on its back and could overheat on the floor because of poor air circulation.
You can see it nicely on this Victron Energy SmartSolar MPPT charge controller: the cooling fins on the back.
Since warm air rises, it should be able to do so unhindered along the cooling fins. So mount the solar charge controller in a (preferably well-ventilated) spot, hanging on the wall.

Defining the Cable Routes
Plan the cable routes so that they do not run over sharp edges and are laid free of chafing.
The red and black cables connect the controller to the battery, while the black solar cable connects the solar controller to the panel.
The solar cable usually comes as one long cable that you have to cut into two pieces to connect the positive and negative terminals.
Installing the Electrics
We start with the electrics, that is, we connect the solar charge controller and the battery and fit a fuse.
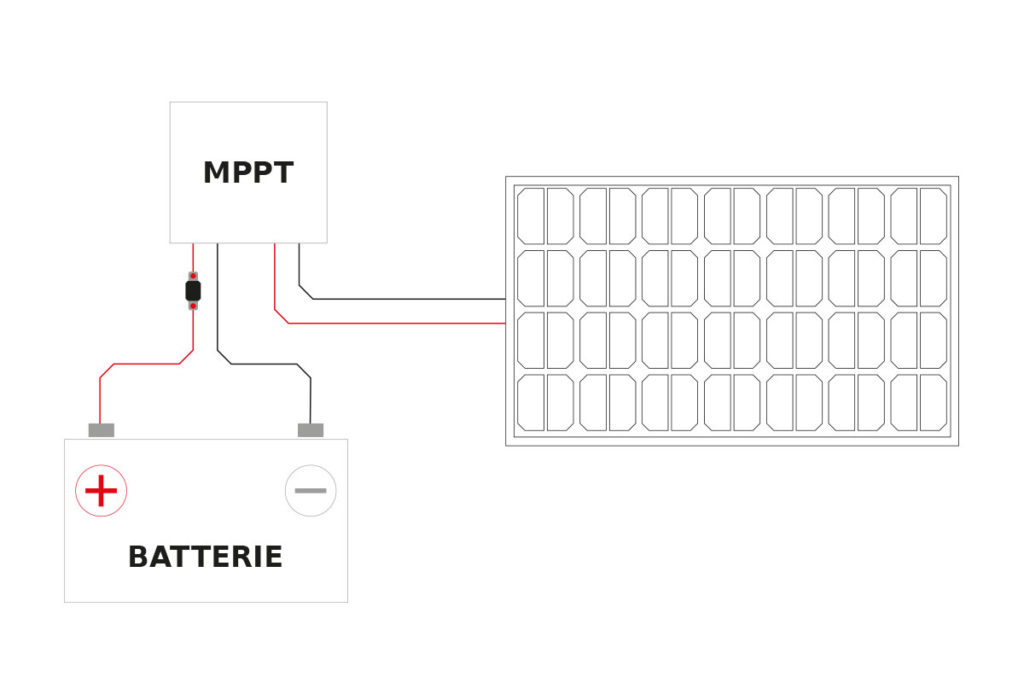
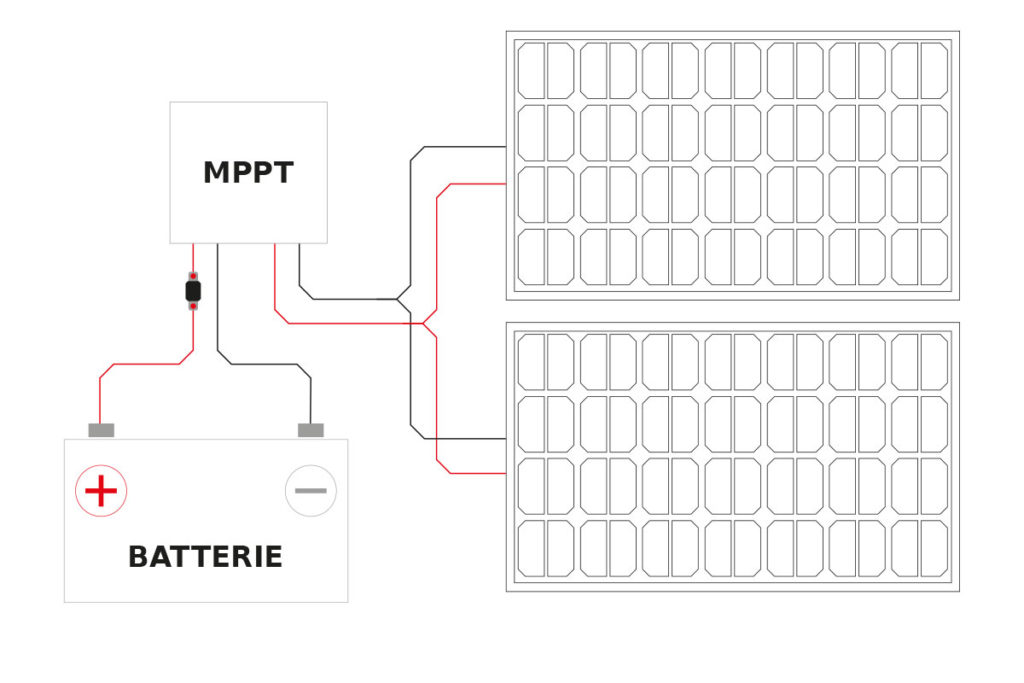
Wiring diagram for one and two solar panels connected to the charge controller and battery
Installing the Fuse
There must always be a fuse between the solar controller and the battery. A fuse of the right rating is included in the complete solar kits.
The fuse should be fitted no more than 30 cm from the battery. Use the supplied fuse holder and the M5 uninsulated ring terminals.
IMPORTANT: Do not insert the fuse yet!
Connecting the Cables
Connect the supplied red cable from the positive terminal of the battery, via the fuse holder, to the Batt+ terminal of the solar charge controller.
Connect the black cable from the negative terminal of the battery to the Batt- terminal of the controller.
Extra tip:
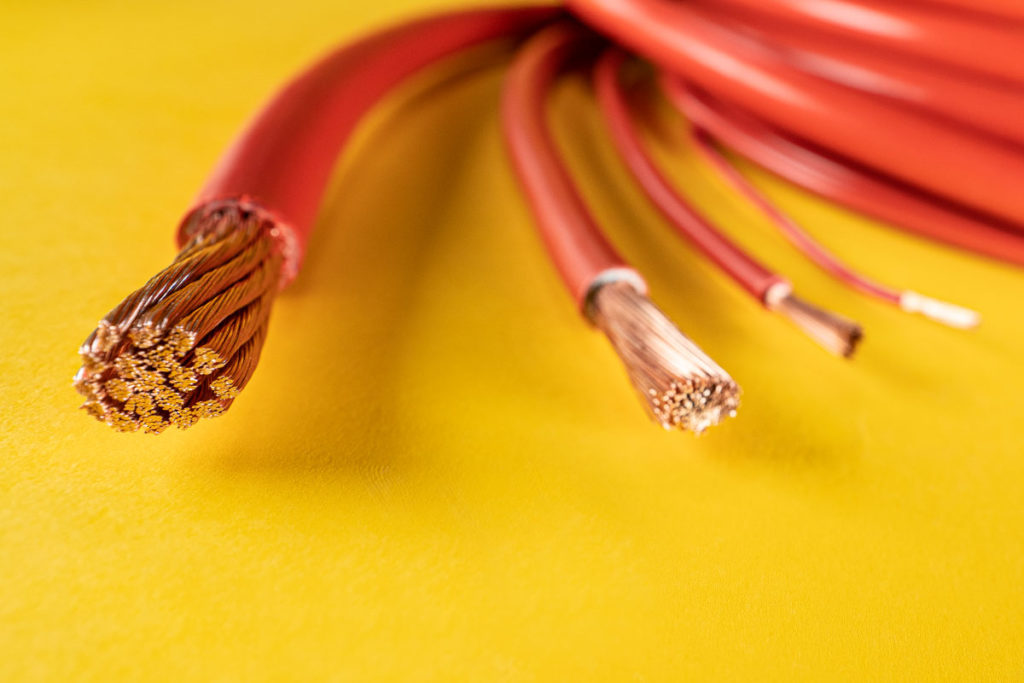
If you are not using a ready-made solar kit, make sure when buying cables that they are high-quality FLY/FLRY automotive cable. Special properties such as increased temperature resistance, flexibility and other vehicle-specific standards ensure safety and reliability in vehicle electrical systems.
How to calculate the right cable cross-section is explained in detail in our article Calculating Cable Cross-Section – Understanding the Formula and Judging the Result.
Update, October 2026:
To make your work easier or to check your calculated results, you can now use the tigerexped cable and fuse calculator. It is designed specifically for use in a camper and takes pitfalls such as the installation method into account directly.
Mounting the Solar Panel
Now it is time to install the solar panel(s). Start with positioning and keep the following in mind:
Finding a Position for the Solar Panel
Whether the solar panel is mounted lengthwise or crosswise to the direction of travel makes little difference in principle. Choose the mounting option that makes the best use of your roof area, especially if you want to install several panels or add other accessories to the roof.
If it makes no difference for your roof layout, mounting the panel lengthwise (with the narrow side facing the direction of travel) can give you a slight fuel consumption advantage thanks to lower air resistance.
When mounting several panels: note that each panel needs room for the brackets on every side – in the gap between two panels side by side, that means twice this space. This may sound trivial, but in practice it is very easily forgotten when planning the roof area, and it happens even to DIY builders who have already installed several motorhome solar systems.

Mounting the Roof Entry Gland and Solar Brackets
Now the solar brackets and the cable entry gland need to be positioned and bonded.
First choose a spot for the roof entry gland, through which the solar cables are routed to the controller inside the vehicle at a convenient point.
tigerexped roof entry gland for two cables – included in the solar packages.

Depending on the solar panel you choose, the package contains only 4 mounting corners or (for long panels) also the two center supports shown. By mounting on the long side, these reduce the susceptibility of large-format panels to vibration and thus considerably increase reliability.

Preparing and Bonding the Solar Brackets
Place the solar panel on the brackets once and pre-drill the holes for the fixing screws that connect the panel and the brackets – this makes the later installation much easier.
Then mark the position of the brackets on the roof with masking tape.
Next, lightly sand the marked bonding areas on the roof and on the brackets.
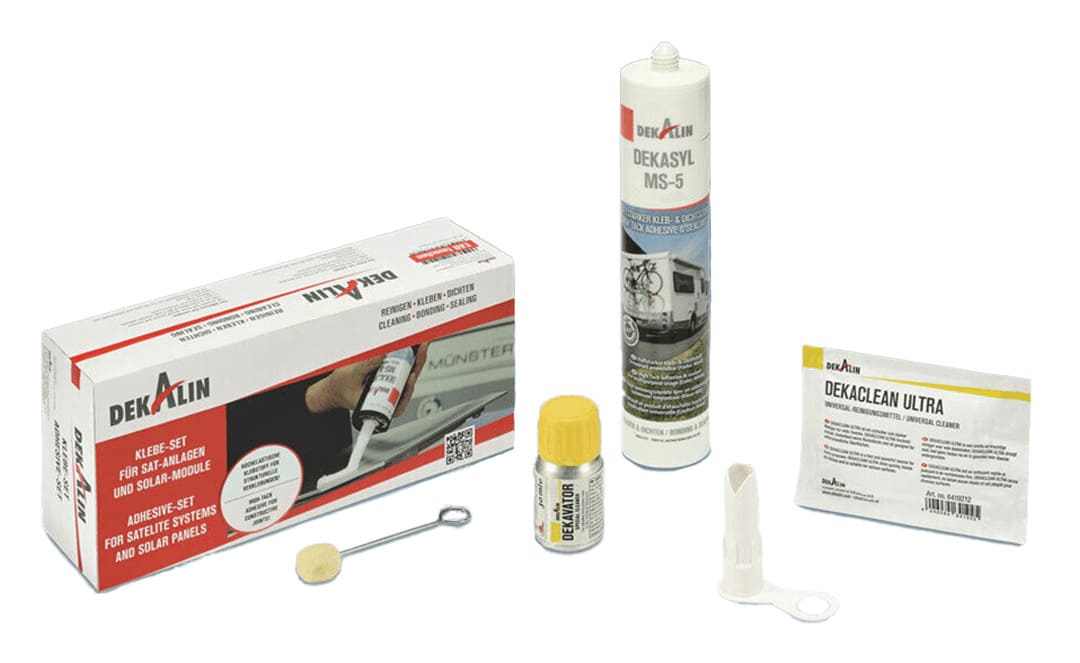
Apply the Dekavator to ensure good adhesion, and bond the brackets to the roof.
Proceed the same way with the cable entry gland.
Before bonding, be sure to follow the manufacturer’s detailed bonding instructions!
When a solar panel is mounted on a motorhome or camper, the adhesive has to work flawlessly, because the mounting points are put under extreme stress by the wind speeds while driving and the large temperature swings on the vehicle roof.
To avoid serious accidents caused by solar panels flying off, strictly follow the adhesive manufacturer’s recommendations on working times, temperatures and surface preparation.
Our complete solar kits include a DEKALIN adhesive kit with bonding instructions and accessories.
Wiring the Solar Panel(s)
Before you screw the panel onto the solar brackets, run the solar cable into the vehicle and connect it to the controller.
The kit includes matching MC4 connectors, which you should use for the connection. These connectors have to be crimped on yourself. Be careful, because MC4 connectors cannot be separated again once assembled.
Notes on Multiple Panel Installations
If you use more than one panel, the wiring matters. In a parallel connection, the positive cables of both panels are clamped onto one MC4 adapter and the negative cables onto another. Each of these MC4 adapters fits the panel connectors only once.
In a series connection the MC4 Y-adapter is not needed, because the positive cable of one panel is connected to the negative cable of the other. If no adapters are included in the kit, it is a series connection.


Marking the Cables
Make sure the cables on the solar panel are marked + and -. Since the supplied solar cable is entirely black, you should mark the cable ends yourself on the controller side to avoid mistakes.
Connecting the Controller
Connect the solar cables to the controller at the PV+ and PV- terminals. The LOAD+/- terminal normally stays unused. You will find details in the controller manual.
Commissioning the Motorhome Solar System
Before you connect all the plugs and insert the fuse, cover the solar panel to avoid arcing. Use the delivery box or a blanket. Once no daylight reaches the solar panels, you can insert the fuse and make all connections.
The controller should now flash blue. Now you can start the setup. For Victron charge controllers, start with the Victron Connect app. How to set the correct voltage and battery type is described in the manual of the respective controller.
We hope this installation guide is a helpful companion for successfully installing your motorhome solar system. As a tigerexped customer, our technical support is of course always happy to help with further questions!
Do you want to size your motorhome solar system individually or need a complete motorhome electrical system? Then take a look at our electrical kit configurator or get phone advice from an expert with tigerexped power pro, including a personal needs assessment and professional assembly of the complete system to your wishes.
Share this installation guide with like-minded people who may also be facing the task of installing a solar system on a motorhome or camper:
These magazine articles might also interest you:


