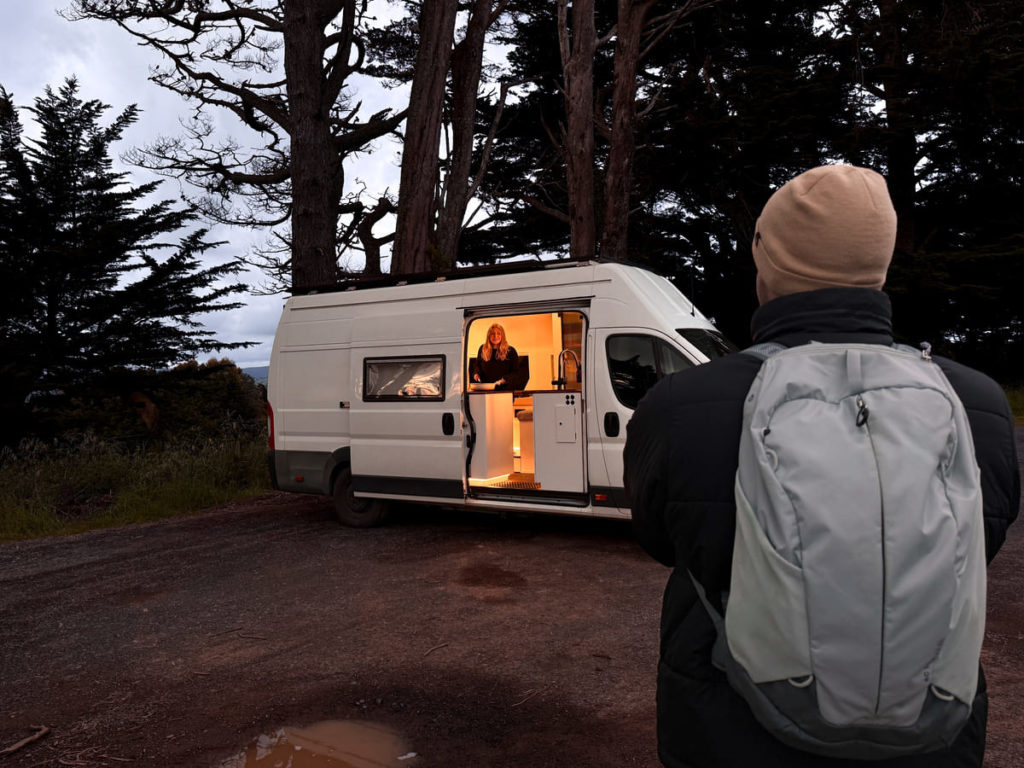
Cozy warmth inside – a basic requirement for a successful camper trip
For most campers, an auxiliary heater in the vehicle is a must – because freezing is definitely not part of the adventure.
The diesel auxiliary heater in particular, planned in right from the build or retrofitted later, has become the preferred solution. Why? Because it is uncomplicated, uses little fuel, needs no separate fuel source and fits well into most vehicles.
The Latvian manufacturer Autoterm has been especially popular for many years – thanks to its rugged durability, the warranty staying intact despite self-installation, and the E-mark that allows the heaters to be installed without any registration entry, no wonder.
In this article you will learn what properties (Autoterm) diesel auxiliary heaters have, what advantages they offer compared to gas or electric heating systems, and what to look out for when choosing, installing and operating one.
In this article we cover diesel air auxiliary heaters, which produce warm air directly to heat the interior. In contrast, there are also diesel water auxiliary heaters, which are integrated into the vehicle’s coolant circuit and can heat both the engine and the interior via heat exchangers. We will cover this relatively less common variant in another article.
What Is a Diesel Auxiliary Heater – and How Does It Work?
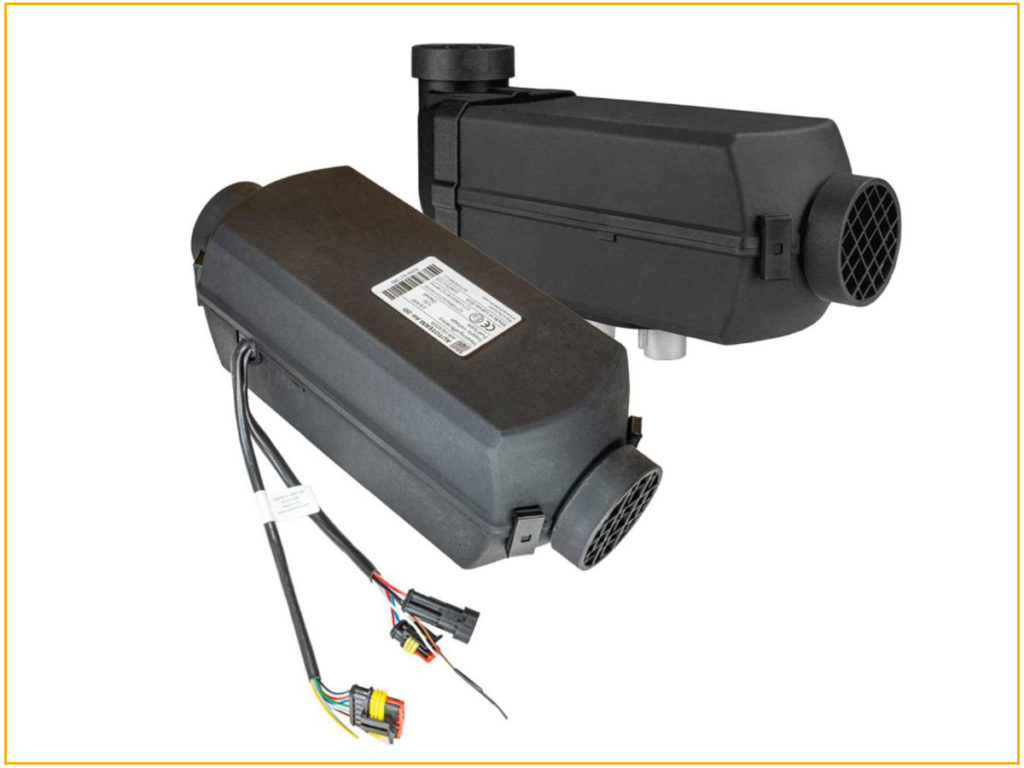
A diesel auxiliary heater is a compact heating system that works independently of the vehicle engine and brings the interior of your camper or motorhome to a comfortable temperature – no matter whether you are driving or parked somewhere in the wilderness.
It uses the diesel fuel already in the vehicle tank and needs only a small amount of power from the leisure battery to operate.
The way it works is quickly explained:
A burner inside the heater ignites the diesel-air mixture and heats a heat exchanger with it. A fan distributes the warm air evenly through flexible air ducts in the vehicle. The exhaust gas is routed directly through the vehicle floor to the outside.

For almost all ordinary travel vehicles, the models with an output of 2 kW or 4 kW are recommended, depending on vehicle size and insulation. Units with integrated altitude adjustment (altitude kit) also work reliably in high mountains – an important point, since combustion like this may otherwise not work properly in the greatly changed air pressure conditions.
That is why Autoterm heaters are used in many travel vehicles. They have proven extremely rugged over the years and are fairly priced at the same time. Produced in Europe and, thanks to the E-mark, installable by laypeople without a registration entry, they come with an altitude kit as standard. We will look at the specific details more closely in the next chapters.
Advantages of a Diesel Auxiliary Heater
Choosing a diesel auxiliary heater brings many advantages in a camper build. Whether a compact panel van or a large motorhome – heating with diesel is in many cases not only efficient but also especially practical. Here you will learn which aspects make the difference in everyday use.
Fuel Always Available
Most campers and motorhomes still have a diesel engine – so why not use the fuel that is already there for heating, too?
A diesel auxiliary heater taps directly into the vehicle tank – so you don’t have to waste space on gas cylinders or spend time and effort getting them. Gas cylinders also add a not inconsiderable amount of weight – a big disadvantage given the limited payload of a motorhome.
With a diesel auxiliary heater, on the other hand, filling up the vehicle also puts the heating fuel automatically on board.
Compact Design Saves Valuable Storage Space
Another advantage is the small space requirement. Besides dropping the gas cylinders as bulky cargo, the heater itself is no bigger than a shoe box and can be installed flexibly – for example under the passenger seat, in a storage box or even outside under the vehicle (note: inside is still always the better option. You can read everything about the pros and cons of underfloor mounting in the article Underfloor Mounting of Auxiliary Heaters – Why We Often Advise Against It.)
Heating Independent of Shore Power
Even though heating systems such as diesel or gas heaters run on a different fuel: they still need electricity for the fan, control unit or ignition.
Electric heaters, on the other hand, need electricity for the entire heating output – and that makes a huge difference. At campsites, small fan heaters are sometimes used to save gas or diesel when a 230-volt hookup is available. If the electricity is billed by consumption, that can get expensive. For anyone who also wants to stay off-grid, electric heating solutions are generally unsuitable. The consumption is simply too high to be covered sensibly by on-board power solutions.
With a diesel auxiliary heater, power consumption is manageable: the Autoterm Air 2D (the most widely used model) draws between 10 and 20 watts in normal operation – so absolutely battery-friendly, especially combined with a good battery or solar system. The heater uses more power when switching on. For a short time it can draw up to 10A in a 12V system, or up to 5A in 24V systems.
The higher power consumption at start-up is brief and normally not a problem. What matters is not to start the heater with a heavily discharged battery, as the voltage drop can then cause failed starts.
With one of the most commonly installed gas heaters with 2.8 kW heating output, the power consumption on the low setting is almost identical.
It is true, by the way, that the manufacturer Truma also makes gas heaters that use no electricity at all – but these are only designed for small caravans, folding trailers etc. They are expressly not approved for installation in self-propelled motorhomes and campers.
Looked at more closely, the power consumption works out roughly like this:
Power Consumption of a Diesel Auxiliary Heater in Different Operating Phases
A small example calculation for a 2kW heater in a 12 volt system, the most common use case.
Switch-on / start phase:
- Current draw: up to 8–10 amps
- Duration: approx. 2–3 minutes, depending on outside temperature and desired heating output
- In this phase the glow plug system is activated and the fan ramps up until combustion runs stably.
Heat-up phase (ramping up to temperature):
- Current draw: approx. 2–3 amps
- Duration: variable, depending on interior volume, insulation and outside temperature.
- Heat is already being produced here, but consumption is still somewhat higher than in normal operation.
Continuous / normal operation:
- Current draw: 0.83–2.42 A (depending on power level and selected fan speed)
- at low heating output often only ~1 A
What This Means for Your Battery
From the values above, the following example calculation results:
- Start phase (10 A × 3 minutes): approx. 0.5 Ah
- Heat-up phase (2.5 A × 10 minutes): approx. 0.4 Ah
- Then continuous operation at 1.2 A (low setting) for 8 hours: approx. 9.6 Ah
Total power consumption over one night (incl. start): ~10.5 Ah
Additional Topic: Battery Technology in This Context
Depending on the battery technology you have installed, the 10.5 Ah we just calculated can mean very different things, e.g. for a 100 Ah battery.
With a lead battery the maximum depth of discharge is 50%, so the usable capacity is only 50Ah and after one night you have used about one fifth (21 %) of your actually usable capacity. 40 Ah left sounds like a lot, but you should recharge the battery soon, especially in cold weather, since you probably want to run other consumers besides the auxiliary heater.
With a LiFePO4 battery, almost 100% of the 100Ah can be drawn without causing damage. So you have used only about 11 % of your usable capacity. With a LiFePO4 battery you could theoretically run the heater for about 8 nights in a row without recharging. Especially if you want to stay off-grid for several days, LiFePO4 battery technology and a power concept tailored to you definitely make sense.

On the topic of tailoring your power concept, feel free to read this article as well:

If you want to bring a lot of battery capacity in a very small space with double the safety, our tigerexped LiFePO4 batteries (now in three sizes) are the right choice. More in the shop:
Tips for Running the Auxiliary Heater in a Battery-Friendly Way
Tip 1:
In very cold conditions, many campers start the heater already while driving – this takes the load off the battery during the highest current draw.
Tip 2:
It is more efficient to let the heater run continuously on a low setting than to keep switching it off and restarting it in between.
Autoterm heaters are designed for continuous operation – in principle you can switch one on when you set off and only switch it off again when you get home three weeks later. For many vacations that is of course not necessary, but it is not a problem either if you go winter camping, for example.
Fuel Consumption
Modern diesel auxiliary heaters run very efficiently: a model like the Autoterm Air 2D uses only about 0.1 to 0.25 liters of diesel per hour at medium heating output. That makes the heater not only more economical but also easier to plan around than gas solutions, where abroad you often don’t know how long a cylinder will last or where to get a replacement.
Just as a rough estimate: the gas heater with 2.8 kW heating output mentioned earlier, often used in ready-built motorhomes, consumes about 120 g per hour at medium setting according to its data sheet. A 5 kg gas cylinder therefore lasts just a little over 5 nights at 8 hours of heating each. It is therefore not uncommon for an additional diesel auxiliary heater to be retrofitted in such vehicles.
Heating While Driving
Autoterm diesel auxiliary heaters may be operated while driving. This means the interior is already pleasantly warm when you arrive at your destination. Especially for families, winter campers or dog owners, that is a clear plus.
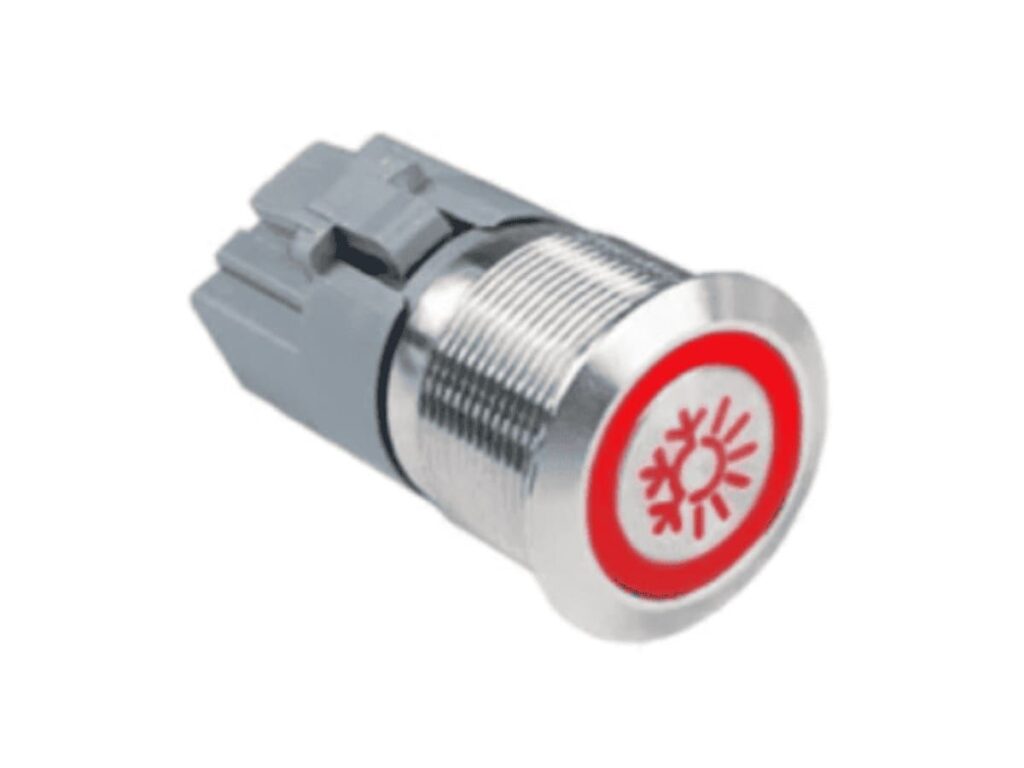
A very practical option for this is installing the Push Control panel – a small switch with which the Autoterm auxiliary heater can be switched on, e.g., from the driver’s seat. The Comfort Control panel with all its settings, on the other hand, is mounted in the seating area or at the bed, where it is always easy to reach in the living space.

Everything about the different control panels, settings and functions, you can find out here:
Operating Noise
A common prejudice against diesel heaters concerns noise – and yes, in the past that was definitely an issue. Today the units have become much quieter.
Modern pumps like the extra-quiet pump (included as standard), the use of silencers and a fan speed that automatically adapts to the set temperature make the system pleasantly quiet.
You can get a small impression of how effective the optionally available Schlafgut silencer is in the following video.
Important note:
The Schlafgut silencer shown here is bent sharply. Such a sharp bend can lead to malfunctions during longer operation of the auxiliary heater in your vehicle. When installing, please plan the space for a straight or only moderately bent silencer!
Goodbye, Gas Cylinder Chaos
Many countries have their own standards for gas cylinders and connections – which means German gas cylinders often can neither be exchanged nor refilled on the road. Anyone traveling abroad for longer quickly runs into a problem.
Of course you could try to buy a local cylinder on site. But where do you put your own while it travels unused in the vehicle? And how do you get rid of the “foreign” cylinder at the end of the trip? Not to mention that you also need a suitable adapter to connect the new cylinder at all – and not every adapter fits every system.
Especially when traveling through several countries, this can quickly become annoying and impractical. By retrofitting a diesel auxiliary heater, all of that disappears completely – it uses the fuel already in the vehicle tank and makes you independent of your gas supply. One real stress factor less, especially on long tours.
Easy to Retrofit – Even in a Camper That Is Already Built Out
Diesel, electricity, exhaust – all topics where you don’t want to get anything wrong. The good news: with some manual skill and the right preparation, installing it yourself is absolutely doable.
Many campers have installed their heater themselves successfully – even without any automotive training. What matters most is that you plan carefully, follow the instructions and proceed step by step.
Warranty and TÜV With Self-Installation
Autoterm auxiliary heaters are easy to install. The warranty is also retained if they are installed by a layperson. What is important, though, is that the heater is still installed correctly, i.e. that you follow the requirements in the manual.
You can download the manual directly here (of course you also get one with the purchase of a heater):
The heaters also have an E-mark, which means they may be installed without a registration entry and without a specialist workshop and do not have to be presented to or inspected by the TÜV.
Rugged and (Self-)Repairable
To achieve the high reliability and ruggedness of the heaters, the manufacturer Autoterm deliberately did without technical (and potentially failure-prone) gimmicks.
The heaters generally run for many years without problems. And should something cause trouble after all, the units can even be repaired yourself with a few tools – for this we stock all spare parts, provide repair manuals and are on hand to advise you (for problems during the warranty period, the heater is of course checked in our workshop on the Lower Rhine).
Hot Water as a By-Product Is Possible
By running the diesel auxiliary heater, hot water can optionally be produced as well, with no additional energy input at all. For this, a boiler designed for the purpose is placed behind the heater in the warm air duct.
On its way through the boiler, the hot water is thus effectively a by-product of the warm air. An independent system that works extremely energy-efficiently.
To be able to enjoy hot water even at summer outside temperatures (without running the auxiliary heater), the combiBOIL hot water boiler can also be heated electrically or even via integration into the coolant circuit of the vehicle.
Learn more about the Hot Shower Kit 2.0, our complete set of Autoterm auxiliary heater and combiBOIL hot water boiler.

As Simple as Possible From Purchase – Practical Complete Kits
So that installing your diesel auxiliary heater doesn’t turn into a hunt for materials, we offer practical complete kits. They contain everything you need for a complete installation – from mounting material and air ducts to the control panel.
A particularly popular kit is our 99 % Camper Kit. The name says it all: it fits 99 % of all common camping vehicles – without special solutions or elaborate modifications. So you get not only the right heater but the matching accessories right along with it. Just order with one click, install – heat.

Contains everything you need:
Our technicians Nico and Lars unpack the kit together with you here, explain all the components and give lots of tips and notes on installation:

You can find our other complete kits, e.g. specifically for the Land Rover Defender or an underfloor kit for VW T5 / T6, here:
If You Don’t Want to Do the Installation Yourself
If you don’t want to take on the installation yourself: here you will find a list of certified installation partners who know how to install Autoterm auxiliary heaters.
Choosing the Right Heating Output
Whether a 2 kW or 4 kW diesel auxiliary heater is the right choice depends mainly on the size and insulation of your vehicle as well as your travel destinations.
As a rough rule of thumb:
for an interior to be heated of less than 16 cubic meters (subtracting the volume of the furniture) and “normal” insulation, a 2kW heater is entirely sufficient.
When in Doubt: Go Smaller!
When choosing between installing 2kW or 4kW of heating output, the temptation is great to go for more output – why not take double the output for a marginal price difference by comparison.
In reality, though, this line of thinking can turn out to be unfavorable. Sizing the heater smaller when in doubt scores with several advantages that should be considered:
1. Better Controllability
The 2kW heater can be turned down further, which means that in mild transitional temperatures the temperature can be raised just enough to reach a precisely comfortable level.
With 4kW of heating output (and thus a 1kW minimum), on the other hand, it can happen that it is too cold without the heater, but with the heater running a window has to be opened after a short time because it gets too hot. So you can choose between goosebumps and sauna. That is not only annoying but also wastes fuel and money, because you are literally heating the outdoors.
2. Potentially Longer Service Life
Letting a smaller heater run continuously is better for the service life of the unit than having to switch an oversized heater on and off often, or running it only ever on the lowest setting. With permanent operation on the lowest setting, soot deposits form in the combustion chamber, which reduce heating output and sooner or later can lead to failures.
3. Quieter Operation, Savings in Power and Fuel
As already discussed above, a diesel auxiliary heater uses a noteworthy amount of power only at start-up. So you can save valuable battery capacity if you simply let the smaller heater run continuously instead of juggling wide temperature swings with the big one.
A nice side effect: the higher fan noise at start-up is avoided this way, too.
4. Less Space and Weight
Last but not least, a 4kW heater simply takes up more room in your camper and weighs almost double, which can definitely matter given the often low payload of campers.

Using 4kW of Heating Output – Our Tip
With the thoughts on heater sizing just mentioned in mind, we would like to recommend our article TWIN Kit – All-in-One Solution for Auxiliary Heater Sizing.
Here we go into more detail on when a 2kW heater is enough and when it no longer is – and why two heaters of 2kW each can actually be a better solution than one with 4kW:
Retrofitting the Diesel Auxiliary Heater
Installing a diesel auxiliary heater sounds like a big project at first – but with good planning and the right material it is quite doable for committed DIY builders. Here you will learn how the installation typically goes and what to watch for during preparation and installation.
Planning and Preparing the Heater Installation
First of all:
For the installation you should have basic workshop equipment – and ideally access to a place where you can also get under the vehicle easily and safely.
Measure your interior carefully before starting any hands-on work and make yourself a small installation plan. To do so, read our following tips and notes on installation and think about where and how the warm air routing should run, how best to reach the fuel tank, etc.
To give you a better impression of the installation process in advance, we have put together some YouTube videos showing a technically sound installation in popular vehicle models.
Alternatively: Have It Professionally Retrofitted – Find an Installation Partner
If you would rather not do the installation yourself after all, here is another pointer to our big list of installation partners. All the workshops listed have earned a certification for installing Autoterm auxiliary heaters and can help you competently.
Installation Locations – Interior vs. Underfloor
The Autoterm Air 2D or 4D can be installed very flexibly. Commonly used is, e.g., the space under the passenger seat or within the furniture build, such as in the seat bench or under the bed.
Underfloor installation is also possible. What at first sounds mainly like a great way to save space in the interior should be looked at in a differentiated way. In fact, the space saving is small and the fan noise is not “locked out” by underfloor mounting either, as it is carried into the interior through the warm air duct that has to be routed inside.
In addition, external mounting exposes the heater to the weather and creates the risk of drawing in exhaust gases.
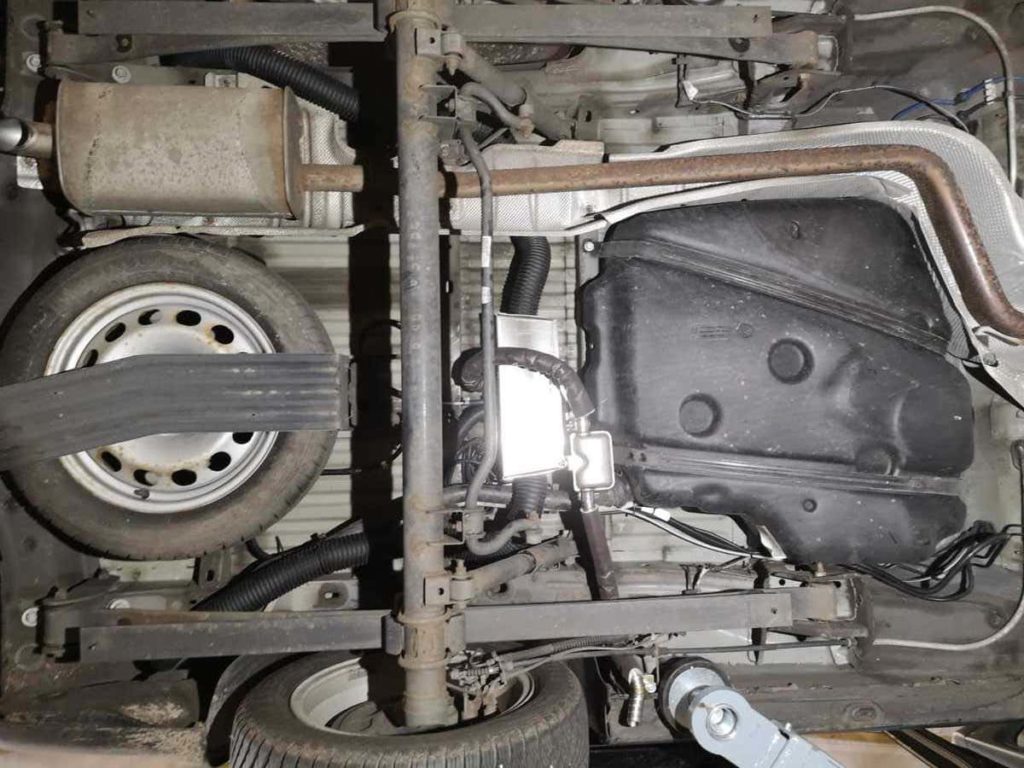
If you are thinking about installing your diesel auxiliary heater under the vehicle floor, please read the following article:
Mounting the Heater
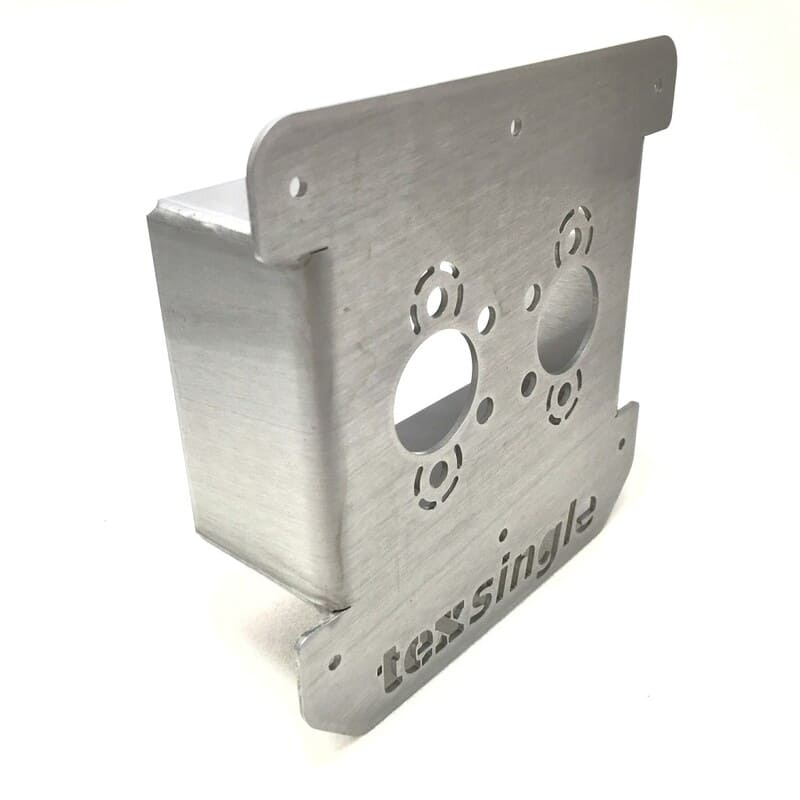
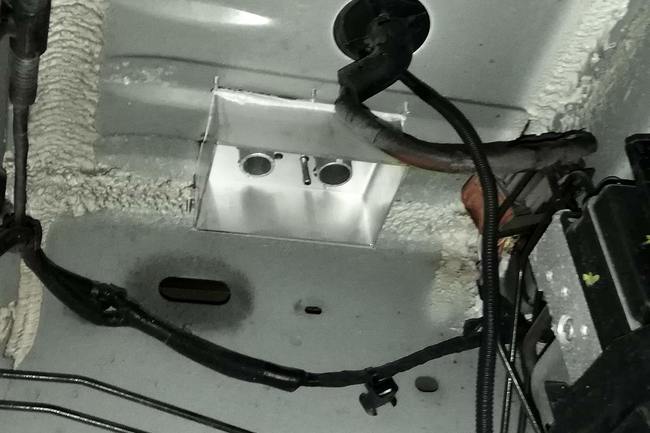
Install the auxiliary heater in the vehicle floor so that the two connections for the combustion air intake as well as the exhaust routing protrude directly to the outside.
Instead of drilling several holes for the necessary openings to the outside, which must be positioned exactly so that the heater can be mounted free of stress, rather use a mounting flange. With it, only a single square hole is needed in the vehicle floor, which can be sealed well against the flange and which also thermally decouples the heater from the vehicle floor on the inside.
Mounting flanges are available for different thicknesses of vehicle floors and different mounting options. One of these two is most likely to be suitable for you.
You can find more options in the auxiliary heater accessories.
Connecting to the Diesel Tank
In principle, the diesel auxiliary heater’s fuel supply can be arranged in several ways. These include
- a T-piece in the vehicle’s fuel line
- a separate tank pick-up for the heater
- a separate auxiliary tank
For many DIY builders, fitting a pick-up into the vehicle tank is a dreaded task. However, it is the technically cleanest solution and is intended that way by the manufacturer. The pick-up tube is therefore already included in the delivery of every heater.
T-pieces in the fuel line, on the other hand, cannot be used without problems in every case. If the vehicle already has a booster heater, this is a clear indication that you can connect the heater via a T-piece. To be sure, talk to a specialist workshop about whether your vehicle model is suitable for this change to the fuel supply.
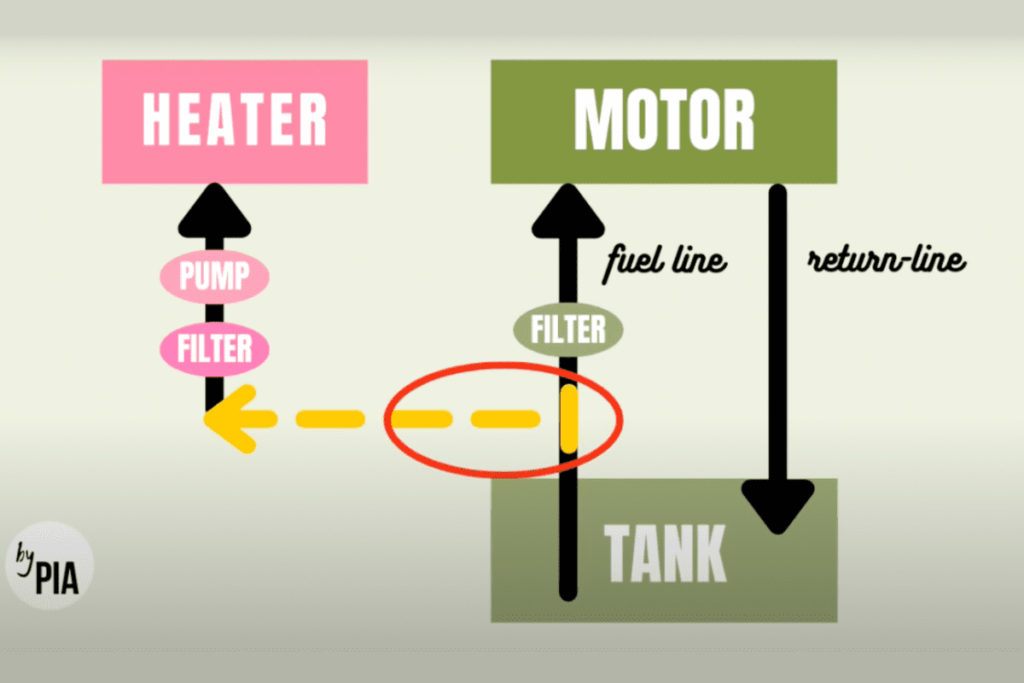
Our guest author Pia has summarized clearly in this article which reasons speak against using a T-piece in the fuel line.
The idea keeps coming up to install a small diesel tank in the interior – for example in a storage box or under the seat bench – to be able to run the heater independently of the main tank. Sounds practical at first, but it is legally and safety-wise not a good idea.
For one thing, there are hardly any tanks on the market that are approved for installation inside the vehicle. Such a tank would have to be
- absolutely leak-tight,
- mounted crash-safe,
- correctly vented and
- mechanically protected
a combination that is hardly easy to achieve in practice. For another, TÜV inspectors usually reject such constructions because the risk is too high: leaks, diesel smell in the living space or, in the worst case, fire hazard in an accident.
The better solution would be an approved underfloor tank mounted outside under the vehicle. Specially designed tanks with matching brackets and standards-compliant venting and filling exist for this. Such models are prepared to be TÜV-friendly, but you still have to have them entered after an inspection.
Conclusion for the fuel supply of your auxiliary heater: on most vehicles, fitting a tank pick-up is not nearly as difficult as most DIY builders fear. Especially on vehicles that did not have an auxiliary heater from the factory, it is the safest and cleanest solution.
In our list of recommended YouTube videos the procedure can be seen in detail several times.
Routing Air and Exhaust Hoses
So that the warm air is distributed in the vehicle as needed, you route warm air hoses from the heater to the desired outlets (e.g. living area, footwell, rear bed).
Note that the air should be able to flow out of and away from the heater as freely as possible – this prevents heat build-up and thus malfunctions of the heater. Sharp bends and kinks in the warm air duct must therefore be avoided at all costs. For these reasons, connecting the diesel auxiliary heater to an existing warm air ducting of a gas heater should also be avoided.
When laying the ducting, the rule is: less is more.
Especially if you also want to run the heater at high altitudes, free “breathing” of the unit is particularly important. This principle applies equally to the discharge of the warm air and to the intake of the room air to be heated.
Tip:
Use the intake of room air to achieve clever “recirculation” and distribution of the room air. For example, fit ventilation grilles in the base of your furniture and position outlets and intake on opposite sides of the living space.

A control damper can be used to steer the warm air routing to suit the situation. You can find out more about it and how such a control damper is installed in this article:
Electrical Connection and Control
Autoterm heaters are connected directly to the 12-volt on-board supply and, with the supplied wiring harness, to your chosen control panel.
The wiring is plug & play overall, as the connectors are designed so that they can only be plugged together at the matching point. Important: don’t forget the fuse.
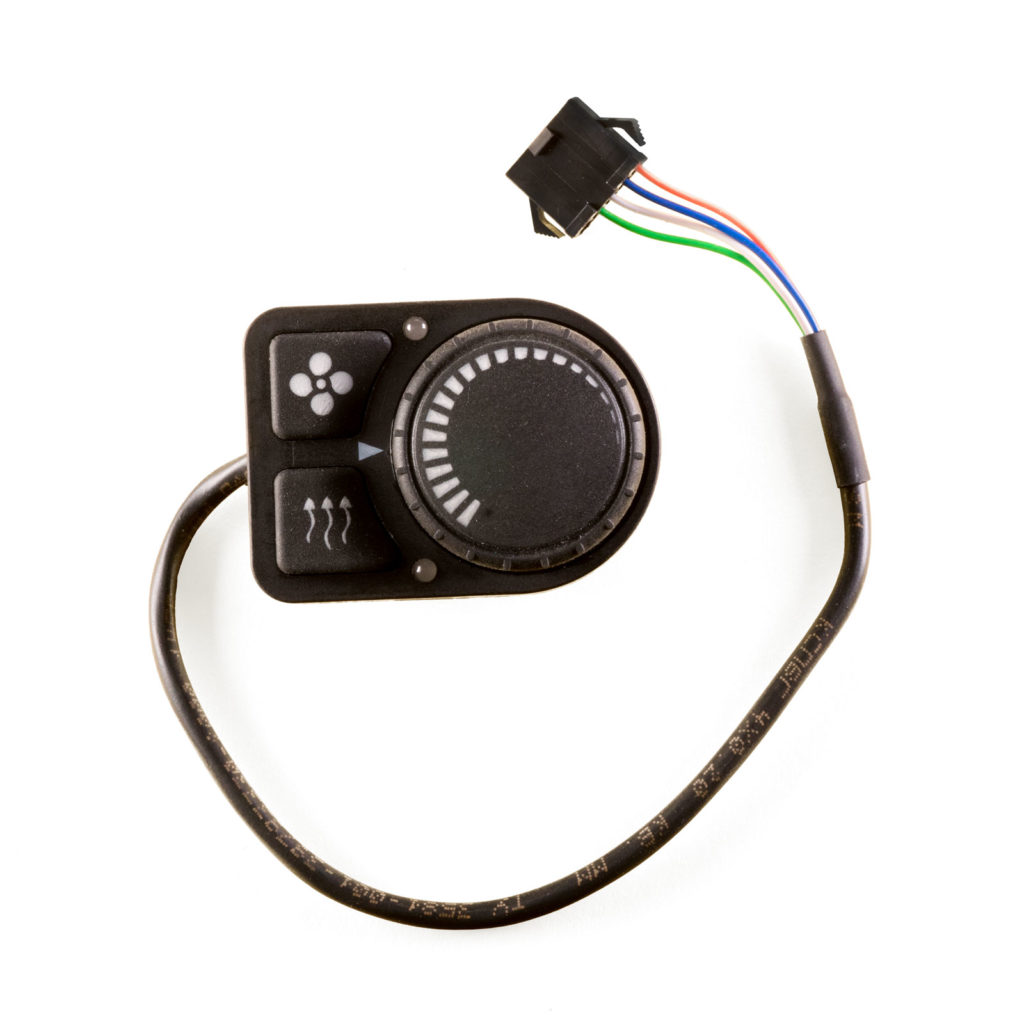
For control you can choose between different control panels. We have put together a detailed, direct comparison of the various options for you in the article Autoterm Control Panels Compared – Heating Modes, Features, Handling.


Maintenance and Care
Autoterm auxiliary heaters are extremely rugged and low-maintenance. They were deliberately designed so that even laypeople can carry out repairs – a must given their original field of use, in the trucks of long-haul drivers in cold, remote areas.
Maintaining the Heater
The only measure for maintenance and care you should pay attention to is running the heater at a high power level at certain intervals. The resulting combustion chamber temperature burns off soot deposits and thus prevents coking.
This is especially important in the transitional seasons, when the heater would otherwise run on the lowest setting the whole time. Also when you return to lower altitudes after a longer stay in the mountains. The heater is equipped with an altitude kit that adjusts the injected fuel quantity, but soot deposits cannot be prevented completely.
The Comfort Control control panel has a burn-off reminder that reminds you at regular intervals to run the heater once for at least 30 minutes at the highest setting.
Maintaining the Fuel Pump
To prevent sticking in the fuel pump, it is advisable to start the auxiliary heater regularly even in the summer months.
Toward winter, you should also remember that from October on, diesel at filling stations (in our latitudes) contains an antifreeze additive that prevents temperature-related clouding. If you have fueled your camper with it, you should also start the auxiliary heater once so that the so-called winter diesel also gets into the line and pump leading to the heater.
Spare Parts and Repairs
To be prepared for every eventuality on long-term and long-distance trips, you can get all necessary spare parts from us, including the required documents and repair manuals.
If, before such trips, you also make sure your auxiliary heater is well protected against damage under adverse conditions, you don’t need to fear cold nights.
For that we recommend these further magazine articles:


Summary: Retrofitting a Diesel Auxiliary Heater in a Camper or Motorhome
A diesel auxiliary heater is the ideal solution for anyone who wants to heat their camper or motorhome off-grid – completely without gas cylinders or shore power. It uses the diesel fuel already on board, is economical in consumption and can be retrofitted without problems in most vehicles.
Particularly recommended are Autoterm diesel auxiliary heaters, which are characterized by high reliability and ease of repair and have proven themselves in use for many years.
When you retrofit your diesel auxiliary heater, you benefit from:
- compact design with little space requirement
- efficient heating output that is also suited to extreme conditions
- easy installation with practical complete kits for DIY builders
- legal certainty thanks to retained warranty and E-mark
So if you want to enjoy more freedom on the road, the diesel auxiliary heater is a real game changer.
Did this article answer your questions about the diesel auxiliary heater?
Feel free to share it with your community:
Tips for further reading: